10-生成器共享
0. 前置修改(极其重要)
后端万用模板使用 OpenAPI 3 版本的接口文档,但是前端 OpenAPI 代码生成器无法很好和该版本的接口文档兼容,建议使用 OpenAPI 2 版本的接口文档
1. 后端修改
- 更换引入的接口文档依赖:
<!-- https://doc.xiaominfo.com/docs/quick-start#openapi2 -->
<dependency>
    <groupId>com.github.xiaoymin</groupId>
    <artifactId>knife4j-openapi2-spring-boot-starter</artifactId>
    <version>4.4.0</version>
</dependency>
- 修改接口文档配置
# 接口文档配置
knife4j:
  enable: true
  openapi:
    title: "接口文档"
    version: 1.0
    group:
      default:
        api-rule: package
        api-rule-resources:
          - com.yupi.web.controller
# 接口文档配置
knife4j:
  basic:
    enable: true
    username: root
    password: ******
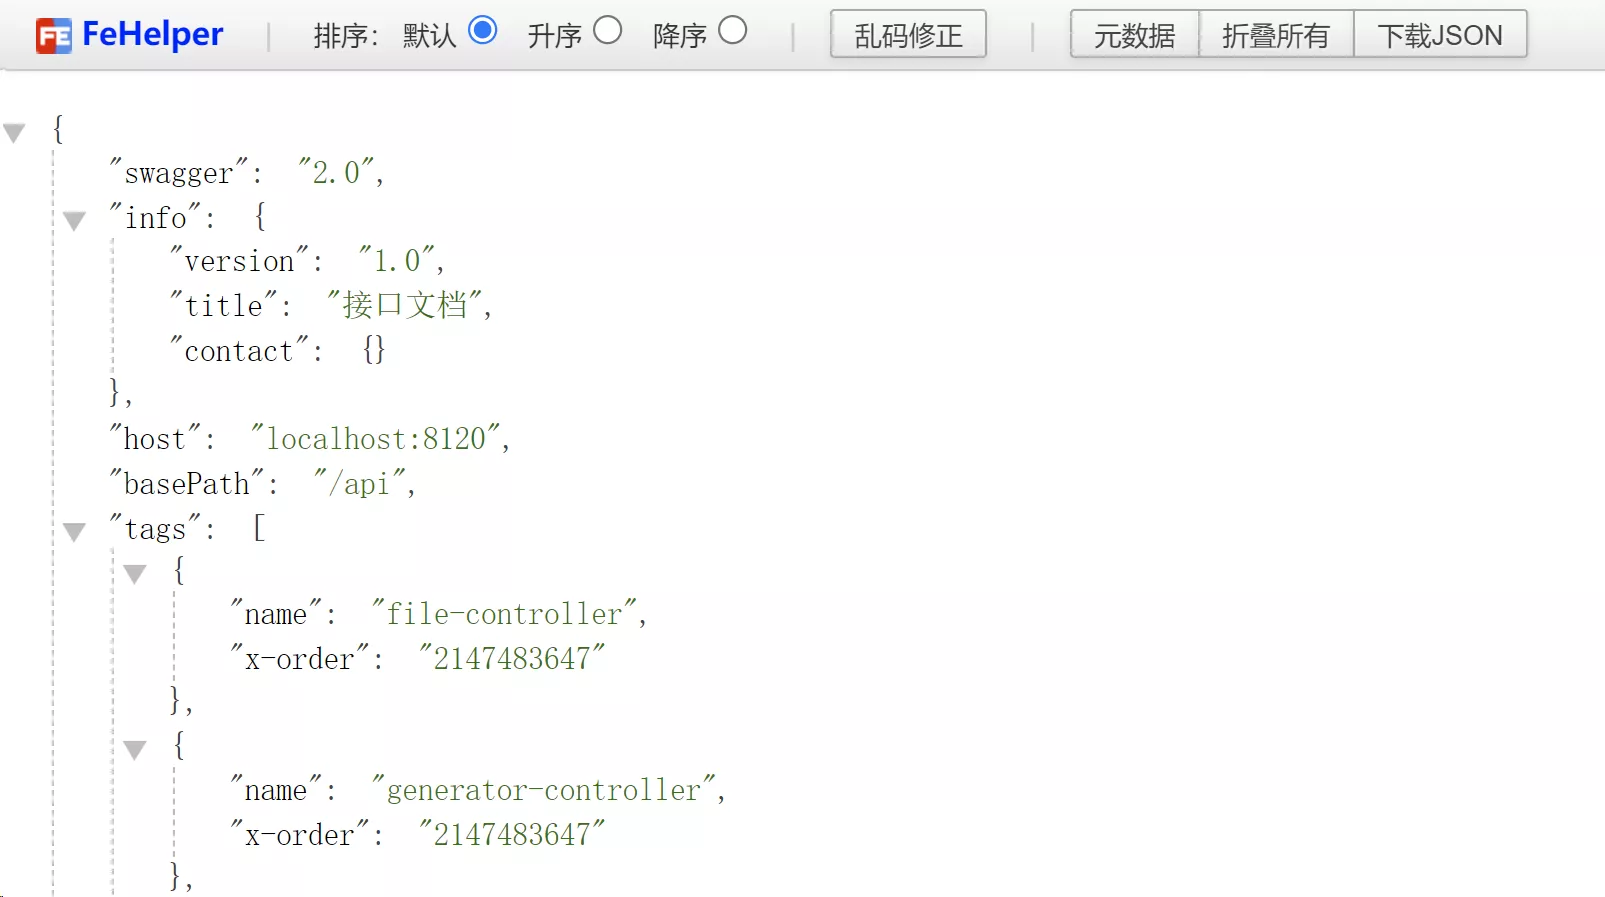
- 访问 http://localhost:8120/api/v2/api-docs 可以看到接口文档定义数据
2. 前端修改
- 替换 OpenAPI 生成工具指定的接口文档地址,重新生成代码
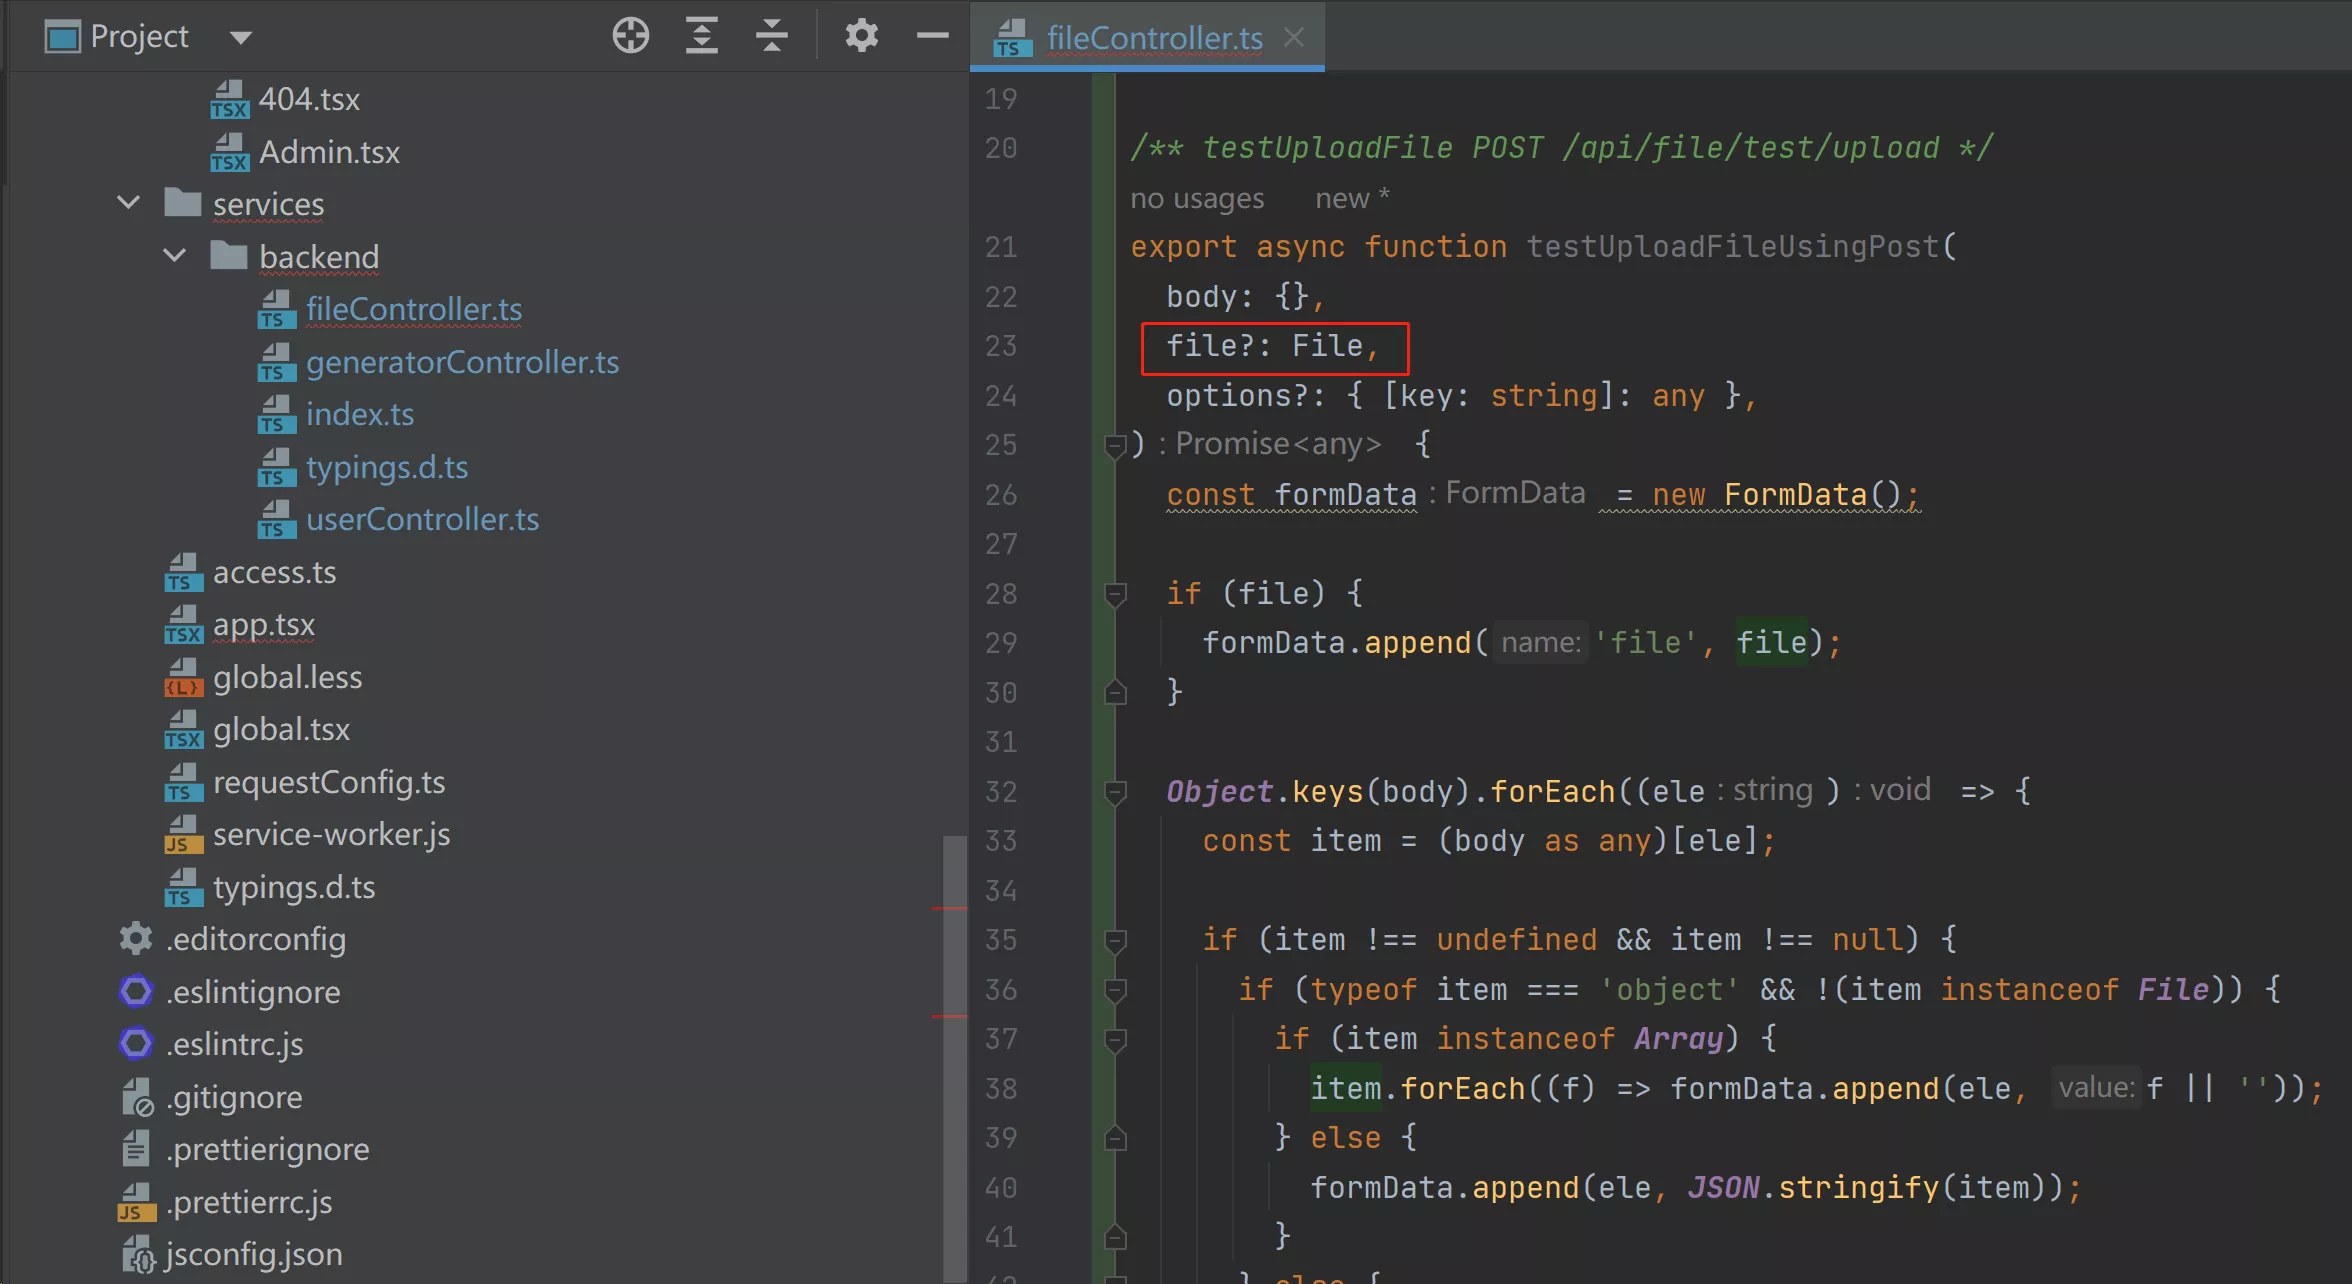
- 重新生成后,得到的代码和原来有一些不同,需要做对应的调整
openAPI: [
  {
    requestLibPath: "import { request } from '@umijs/max'",
    schemaPath: 'http://localhost:8120/api/v2/api-docs',
    projectName: 'backend',
  },
]
- 修改本地请求地址,移除
/api后缀,因为生成的代码自动将后缀拼接到了请求代码中
/**
 * 本地后端地址
 */
export const BACKEND_HOST_LOCAL = "http://localhost:8120";
- 启动项目,根据报错修改所有请求函数名称,因为新生成的函数名后缀会携带请求类型
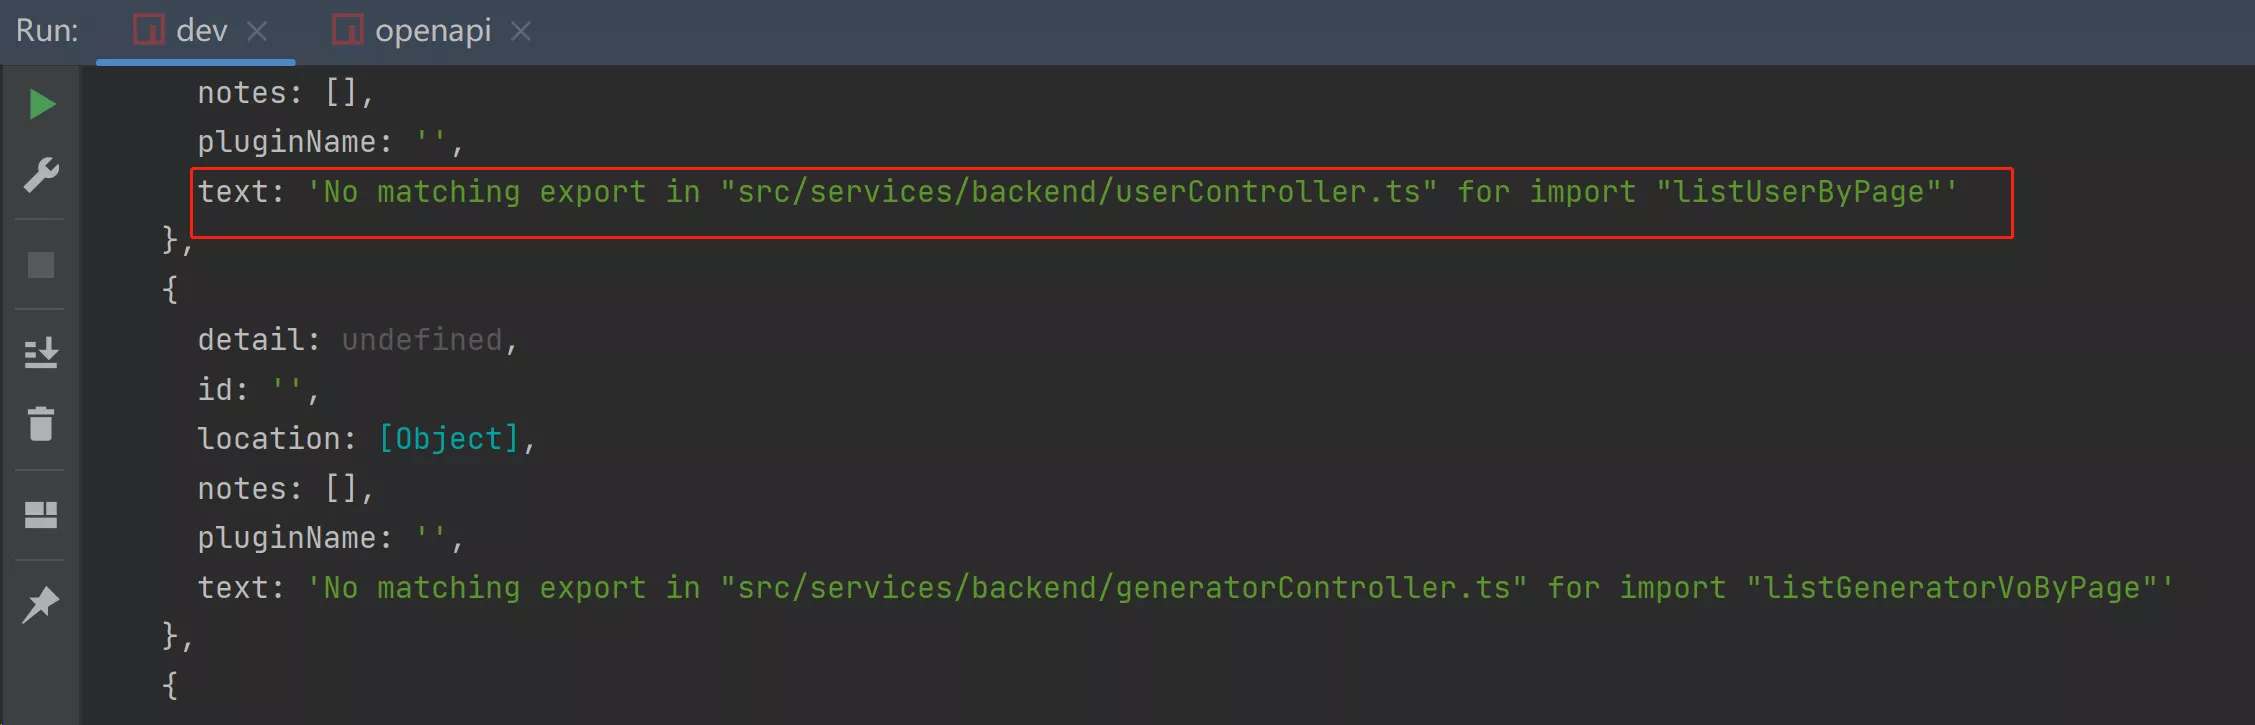
- 将
listUserByPage替换为listUserByPageUsingPost即可,其他位置同理 - 修改完成后,顺利启动项目
1. 需求分析
核心需求:实现文件上传下载功能,让用户能够上传和下载代码生成器产物包
- 代码生成器创建(修改)页面,用户可以上传生成器
- 代码生成器详情页面,用户可以查看和下载代码生成器
2. 通用文件上传下载
最简单的方式:上传到后端项目所在的服务器,直接使用 Java 自带的文件读写 API 就能实现。缺点:
- 不利于扩展:单个服务器的存储是有限的,如果存满了,只能再新增存储空间或清理文件
- 不利于迁移:如果后端项目要更换服务器部署,之前所有的文件都要迁移到新服务器,非常麻烦
- 不够安全:如果忘记控制权限,用户很有可能通过恶意代码访问服务器上的文件,而且想控制权限也比较麻烦,需要自己实现
- 不利于管理:只能通过一些文件管理器进行简单的管理操作,但是缺乏数据处理、流量控制等多种高级能力
因此,除了存储一些需要清理的临时文件之外,通常不会将用户上传并保存的文件(eg:用户头像)直接上传到服务器,而是更推荐使用专业的第三方存储服务,专业的工具做专业的事。其中,最常用的便是 对象存储
1. 什么是对象存储
对象存储是一种存储 海量文件 的 分布式 存储服务,具有高扩展性、低成本、可靠安全等优点
- 比如开源的对象存储服务 MinIO,还有商业版的云服务,像亚马逊 S3(Amazon S3)、阿里云对象存储(OSS)、腾讯云对象存储(COS)等
- 使用最多的对象存储服务当属腾讯云的 COS 了,除了基本的对象存储的优点外,还可以通过控制台、API、SDK 和工具等多样化方式,简单快速地接入 COS,进行多格式文件的上传、下载和管理,实现海量数据存储和管理
- 之前搭建的图床就是使用了 COS 对象存储实现
2. 创建并使用
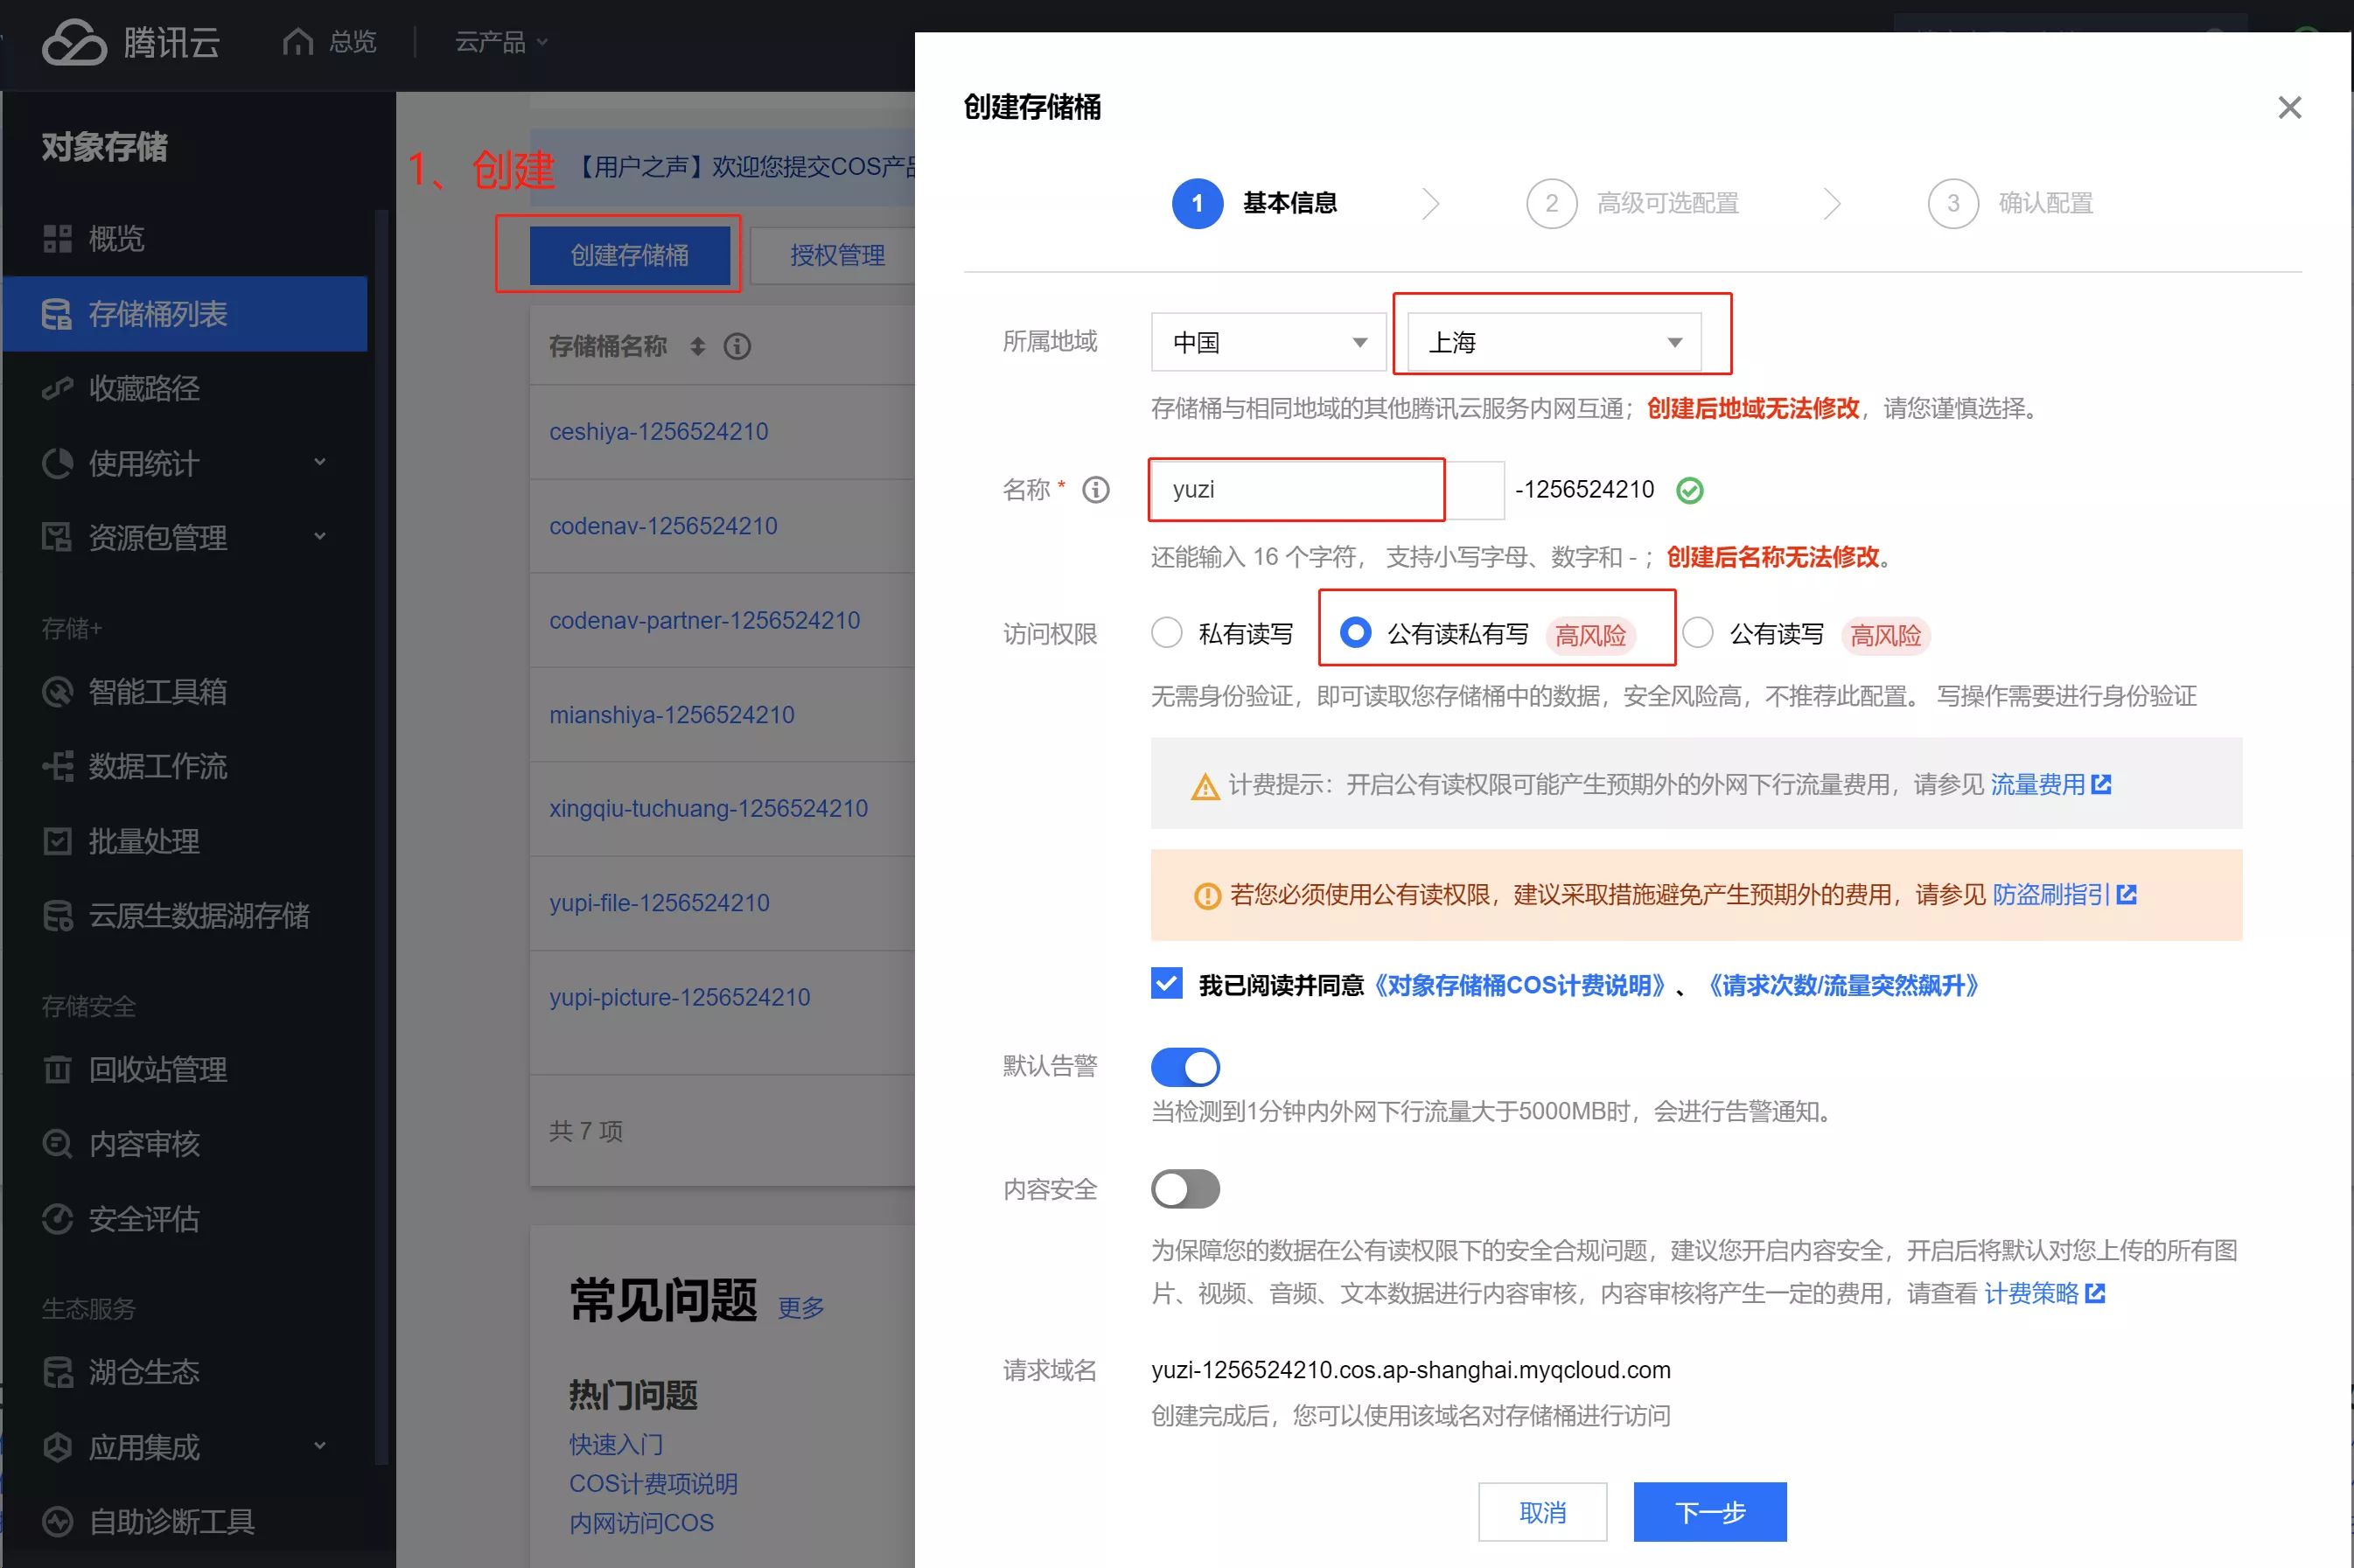
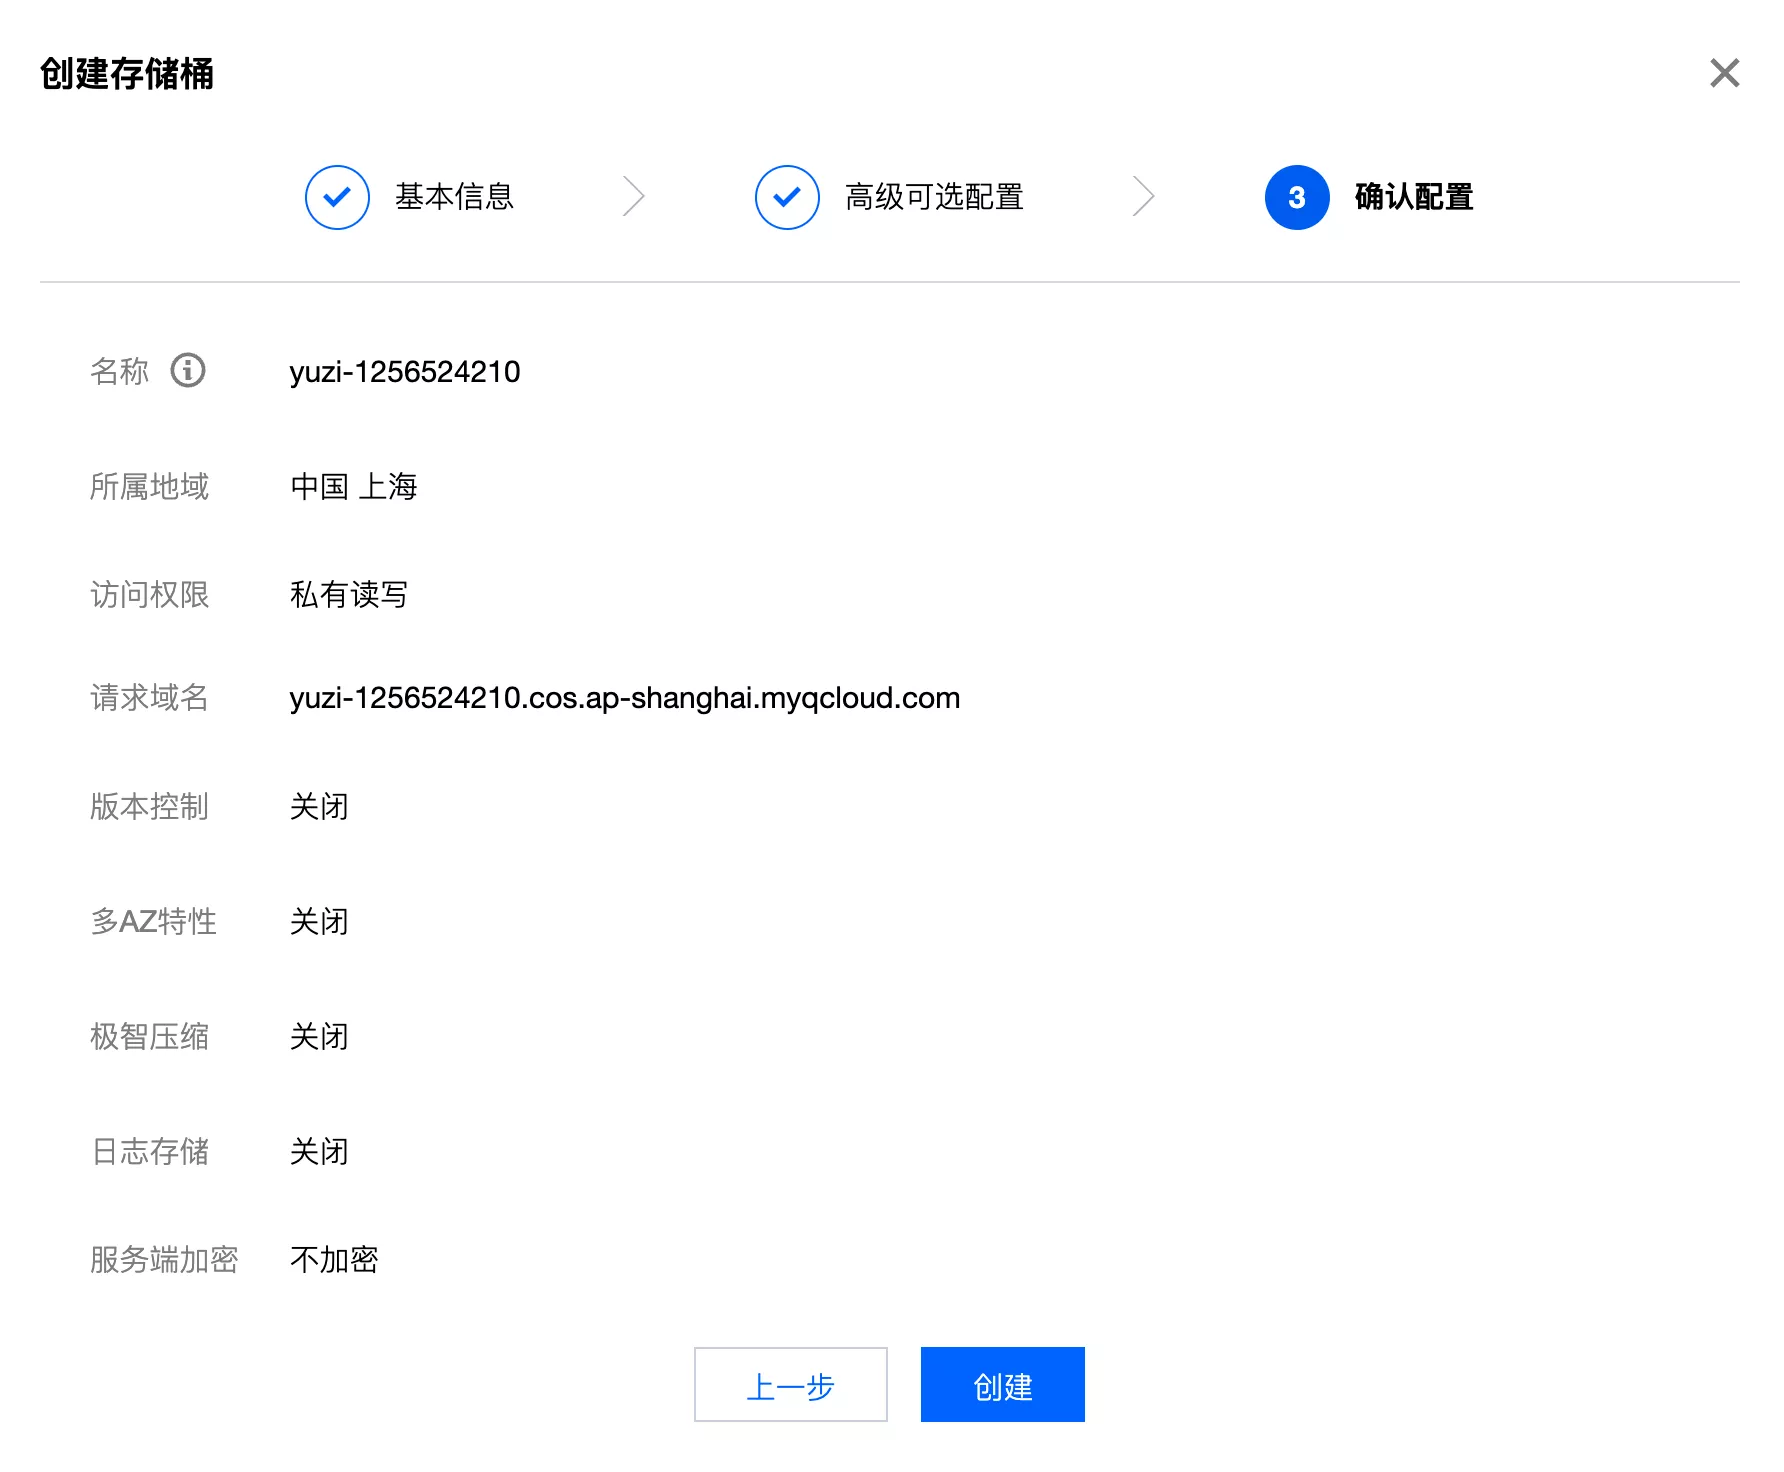
首先进入对象存储的控制台,创建存储桶,腾讯 COS 地址
- 可以把存储桶理解为一个存储空间,和文件系统类似,都是根据路径找到文件或目录(eg:
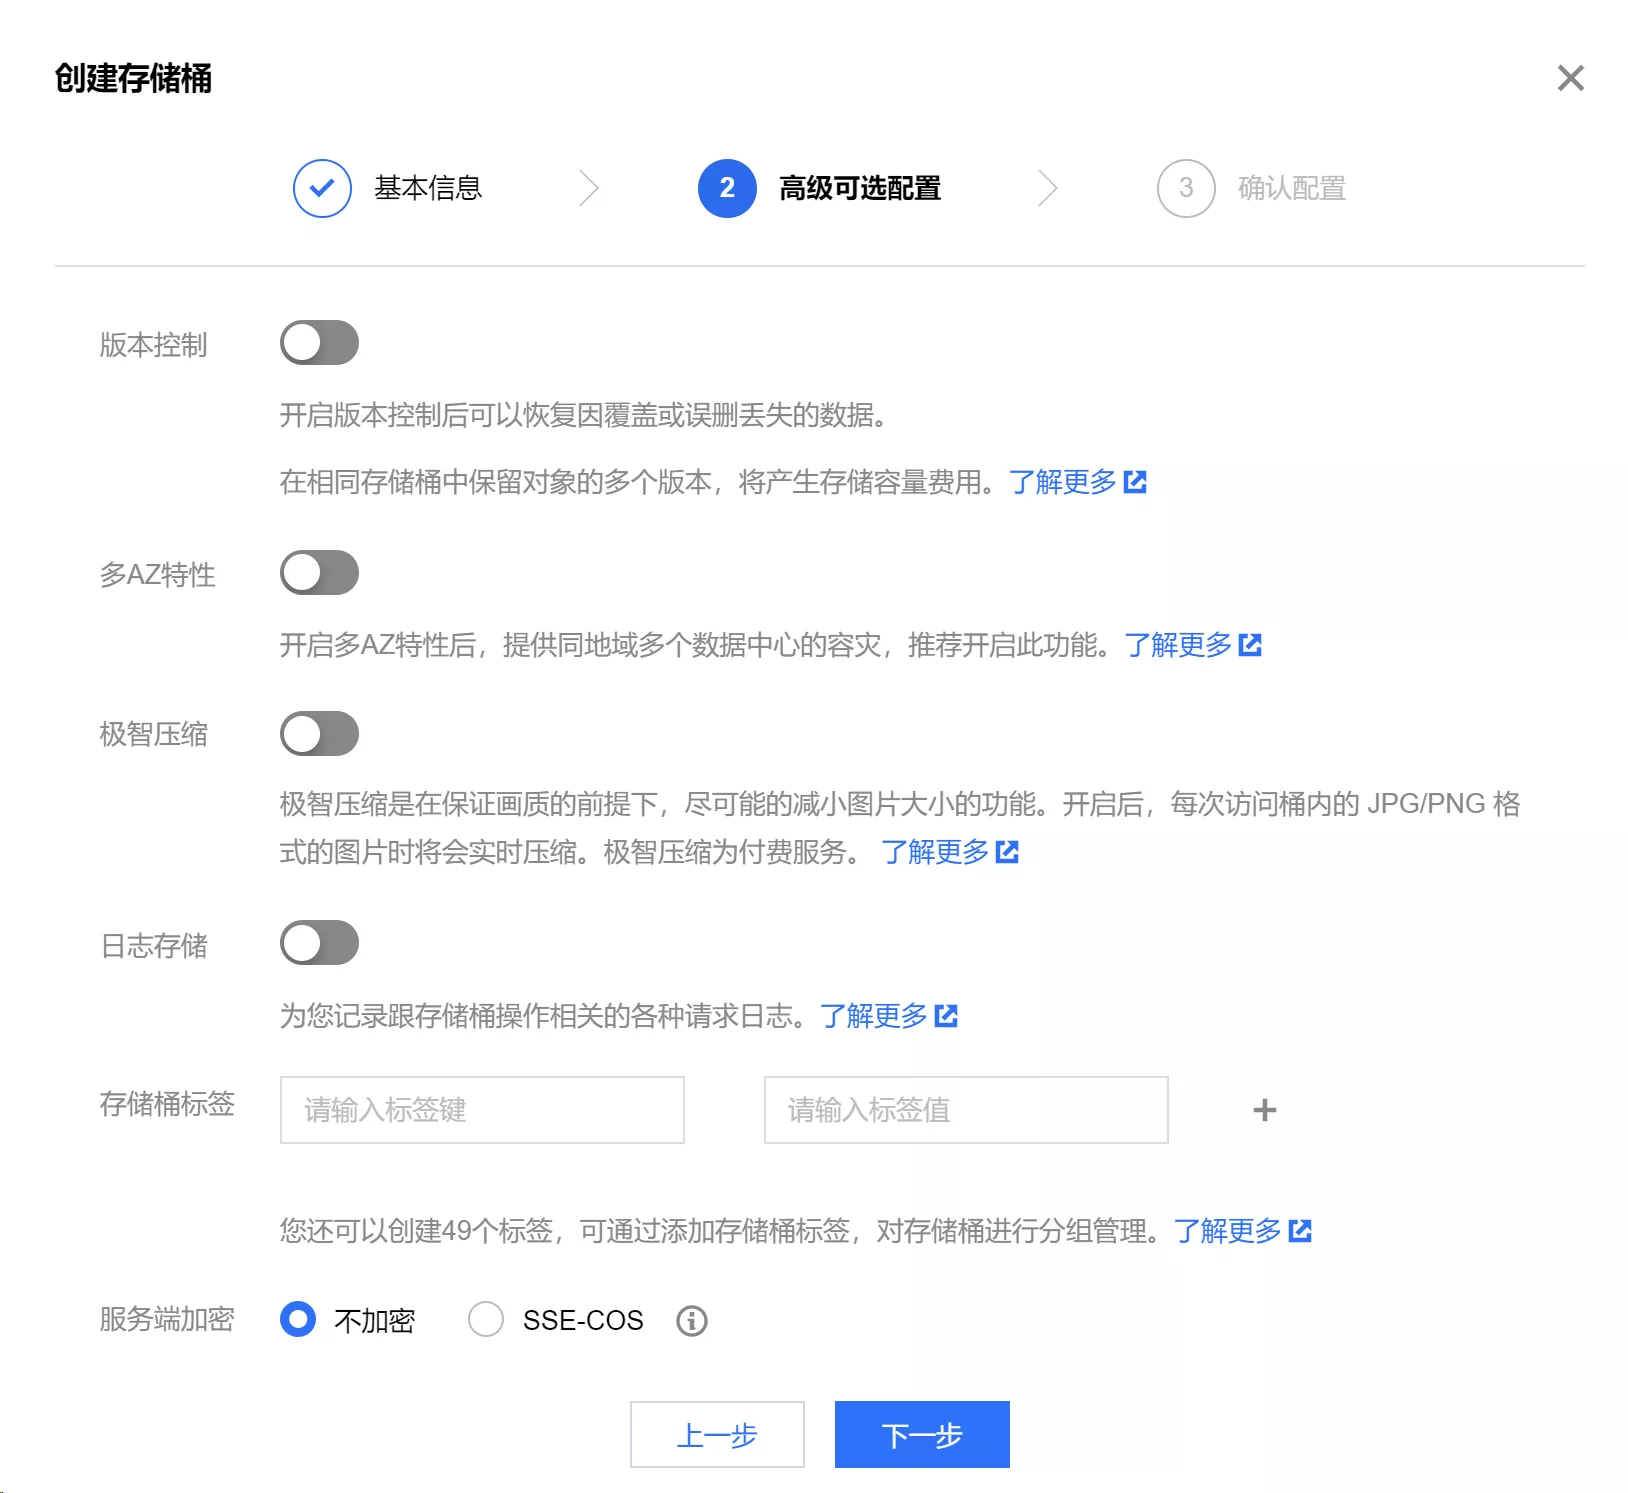
/test/aaa.jpg)。可以多个项目共用一个存储桶,也可以每个项目一个 - 点击创建存储桶,注意地域选择国内(离用户较近的位置)。此处访问权限先选择“公有读私有写”,因为存储桶要存储允许用户公开访问的代码生成器图片
- 如果整个存储桶要存储的文件都不允许用户访问,建议选择私有读写,更安全
- 默认告警一定要勾选!因为对象存储服务的存储和访问流量都是计费的,超限后要第一时间得到通知并进行相应的处理
- 不用太担心,自己做项目一般是没人攻击的,而且对象存储很便宜,正常情况下消耗的费用寥寥无几
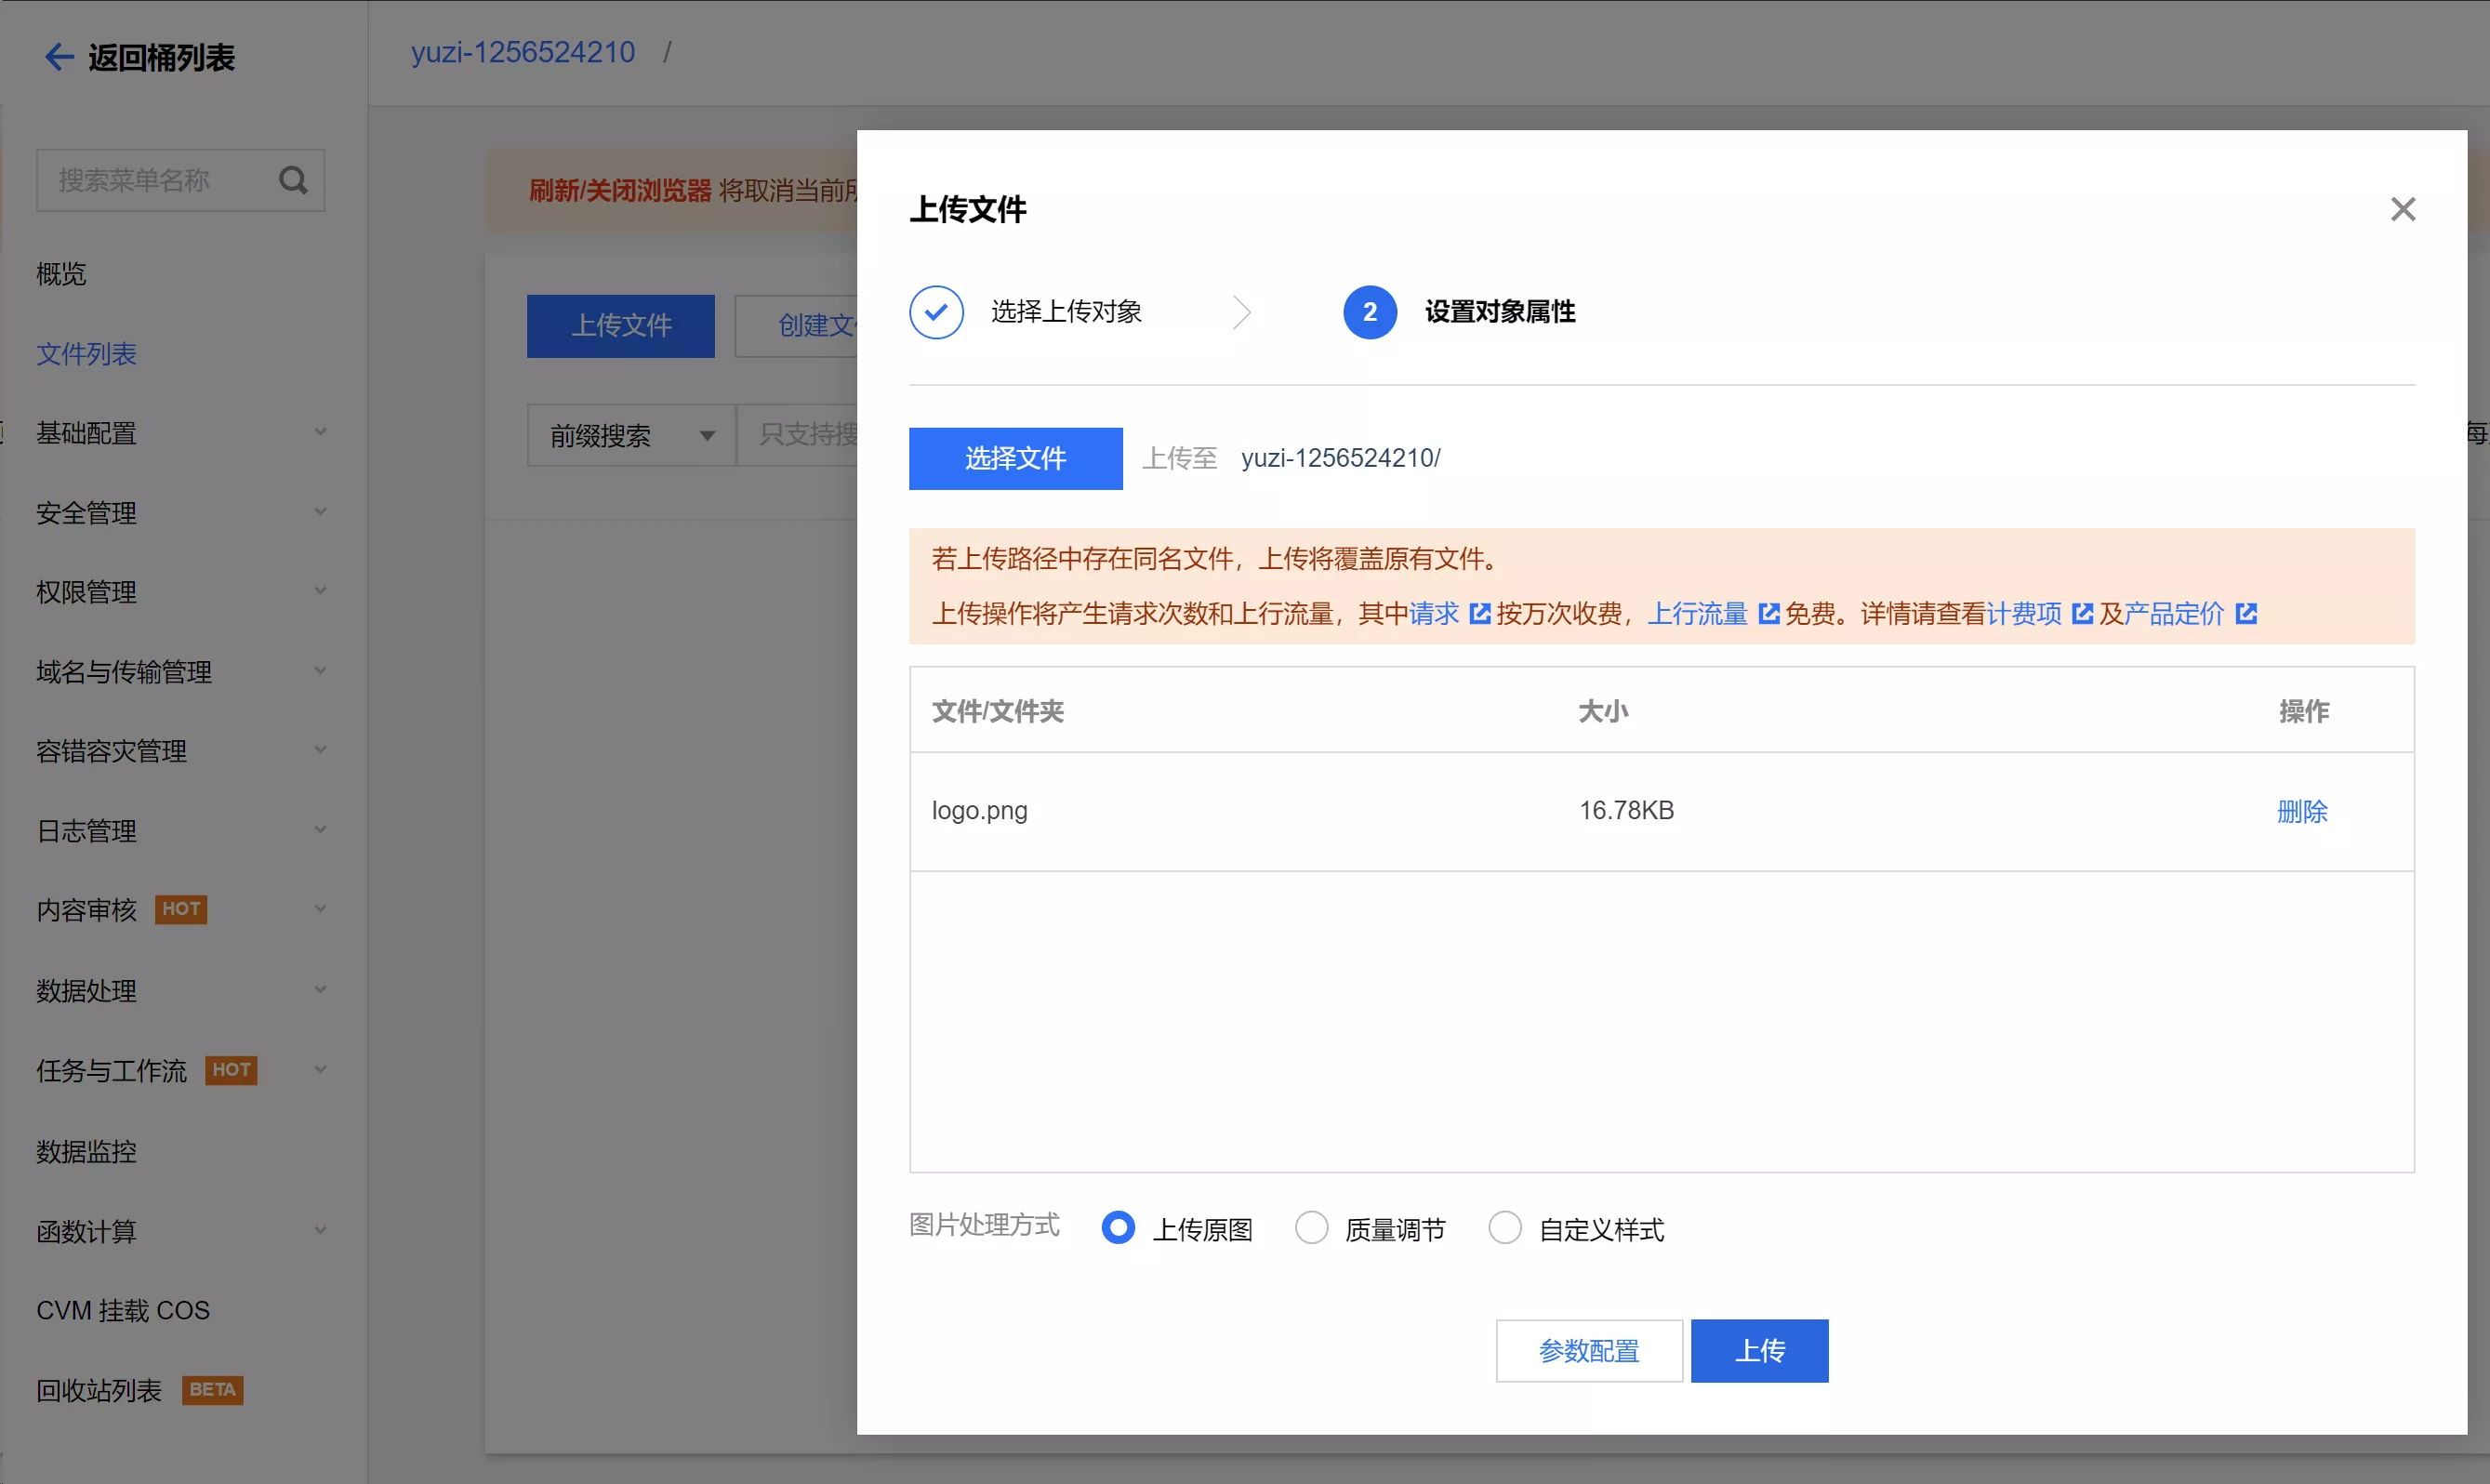
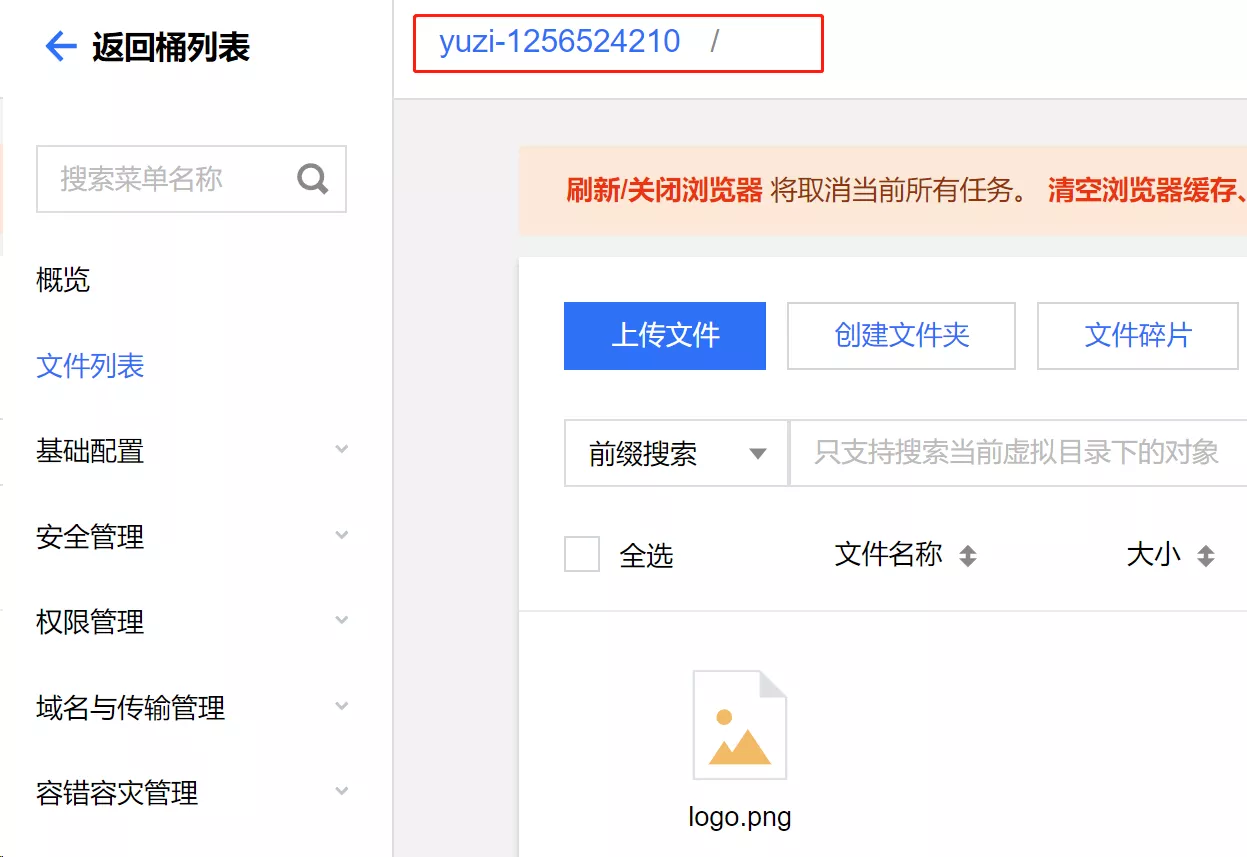
开通成功后,可以试着使用 web 控制台上传和浏览文件:
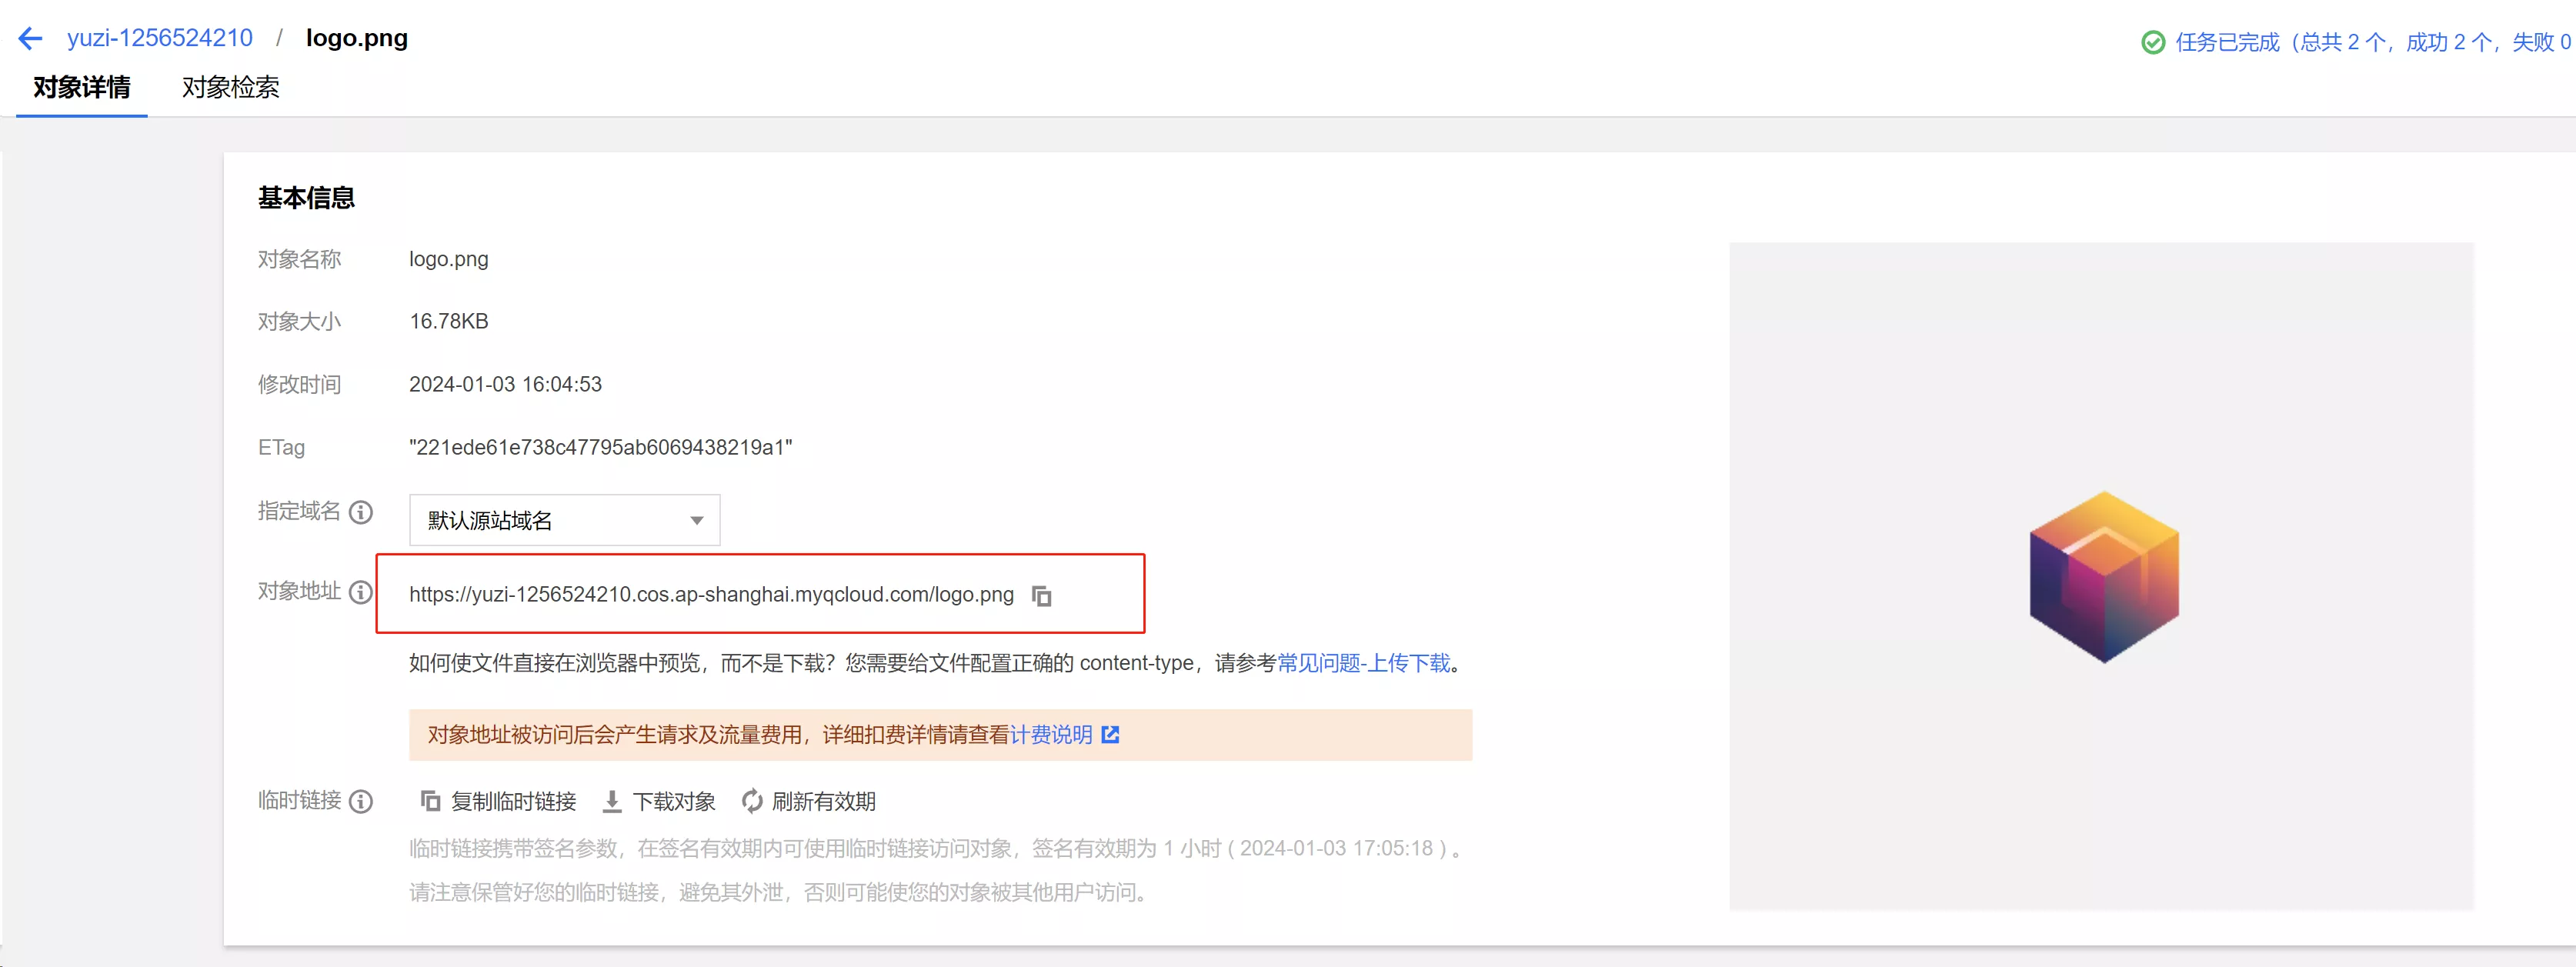
上传文件后,可以使用对象存储服务生成的默认域名,在线访问图片
3. 后端操作对象存储
- 快速入门或 Java SDK 文档,就能快速入门基本操作(增删改查都有)
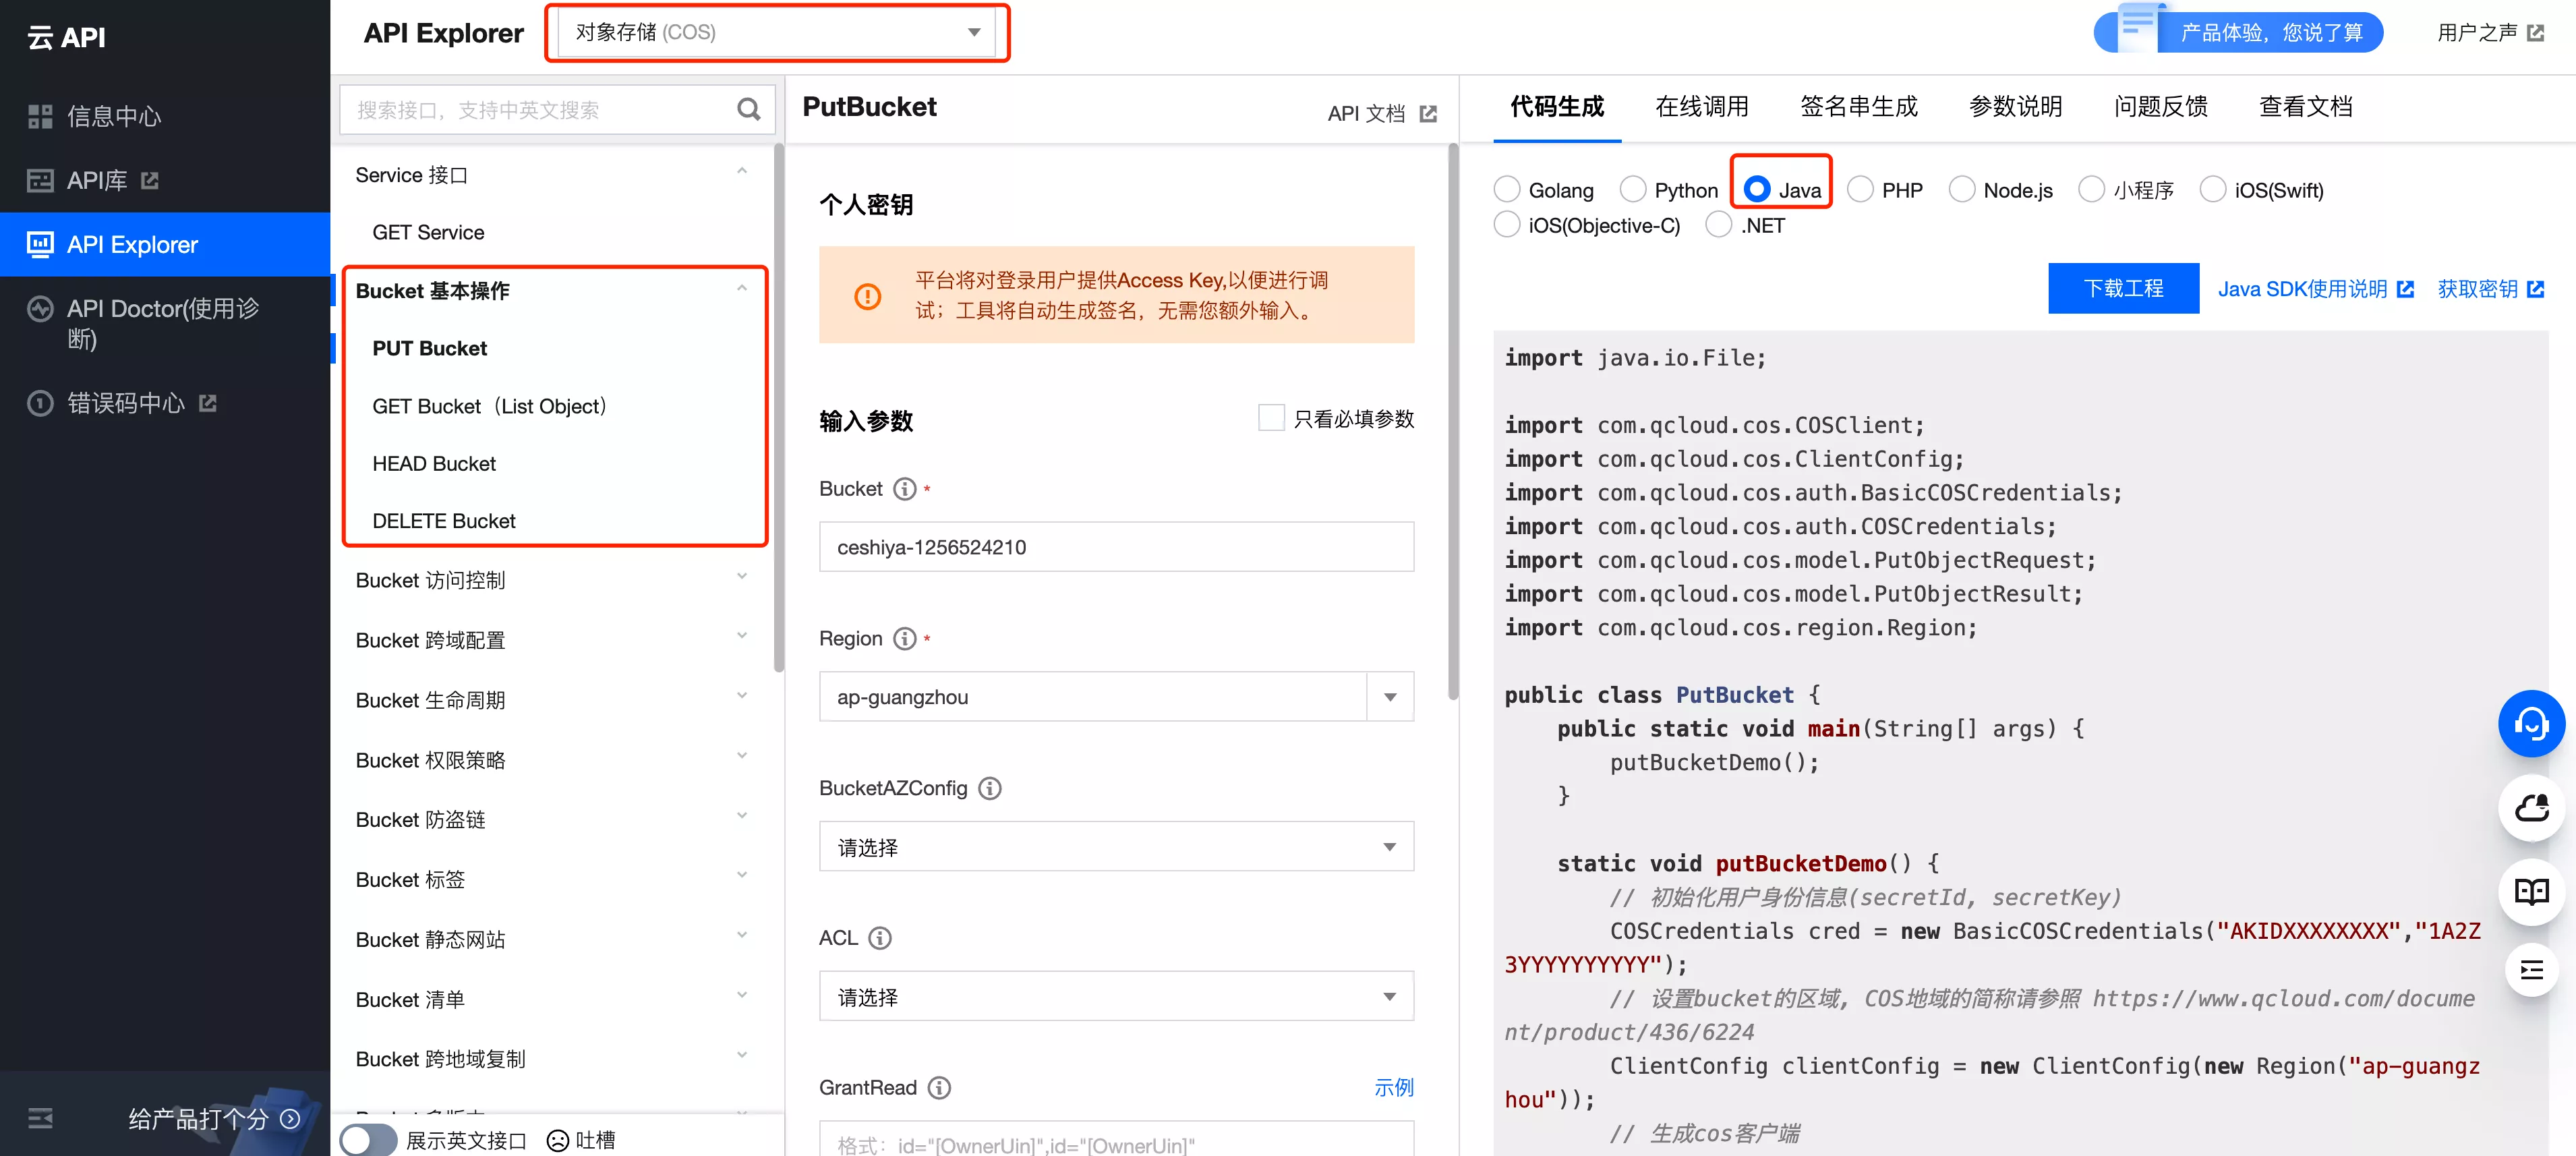
- 更高级的学习操作方法,可以直接使用 API Explorer。在线寻找操作和示例代码
1. 初始化客户端
<!-- https://cloud.tencent.com/document/product/436/10199-->
<dependency>
    <groupId>com.qcloud</groupId>
    <artifactId>cos_api</artifactId>
    <version>5.6.89</version>
</dependency>
参考官方文档,要先初始化一个 COS 客户端对象,和对象存储服务进行交互
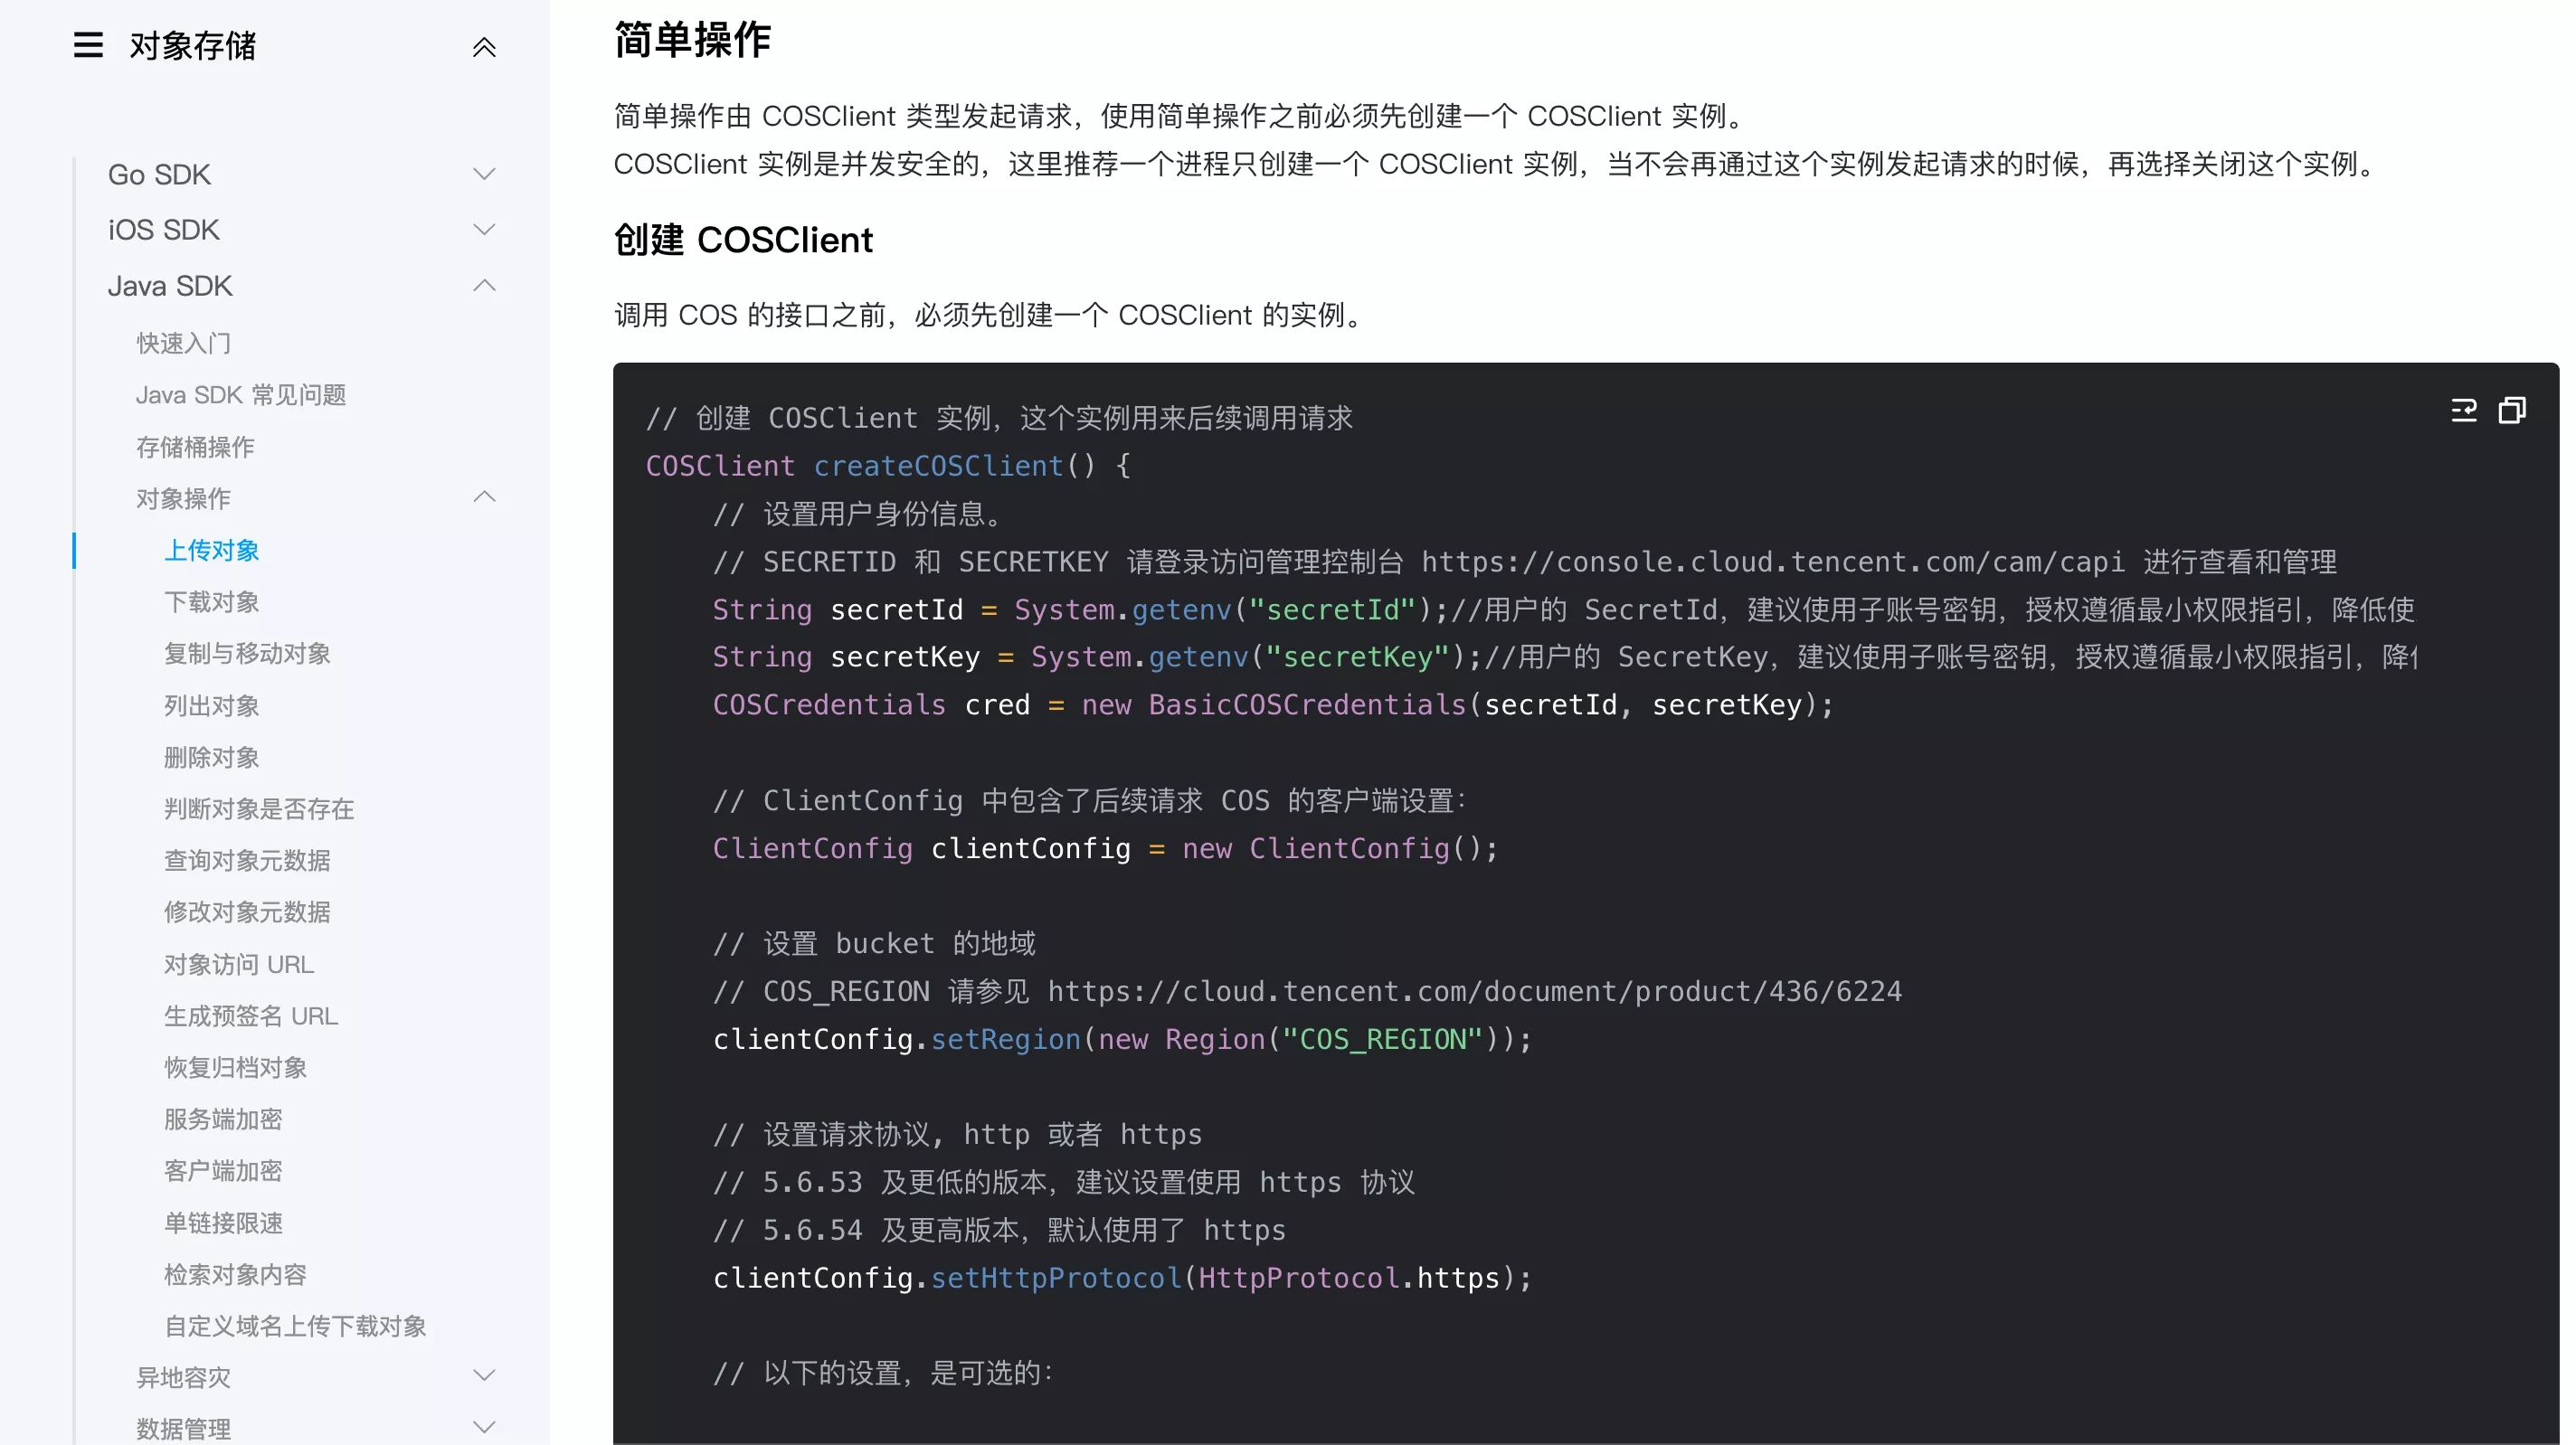
- 在
config目录下新建CosClientConfig类。负责读取配置文件,并创建一个 COS 客户端的 Bean
@Configuration
@ConfigurationProperties(prefix = "cos.client")
@Data
public class CosClientConfig {

    /**
     * accessKey
     */
    private String accessKey;

    /**
     * secretKey
     */
    private String secretKey;

    /**
     * 区域
     */
    private String region;

    /**
     * 桶名
     */
    private String bucket;

    @Bean
    public COSClient cosClient() {
        // 初始化用户身份信息(secretId, secretKey)
        COSCredentials cred = new BasicCOSCredentials(accessKey, secretKey);
        // 设置 bucket 的区域, COS 地域的简称请参照 https://www.qcloud.com/document/product/436/6224
        ClientConfig clientConfig = new ClientConfig(new Region(region));
        // 生成 cos 客户端
        return new COSClient(cred, clientConfig);
    }
}
- 填写配置文件
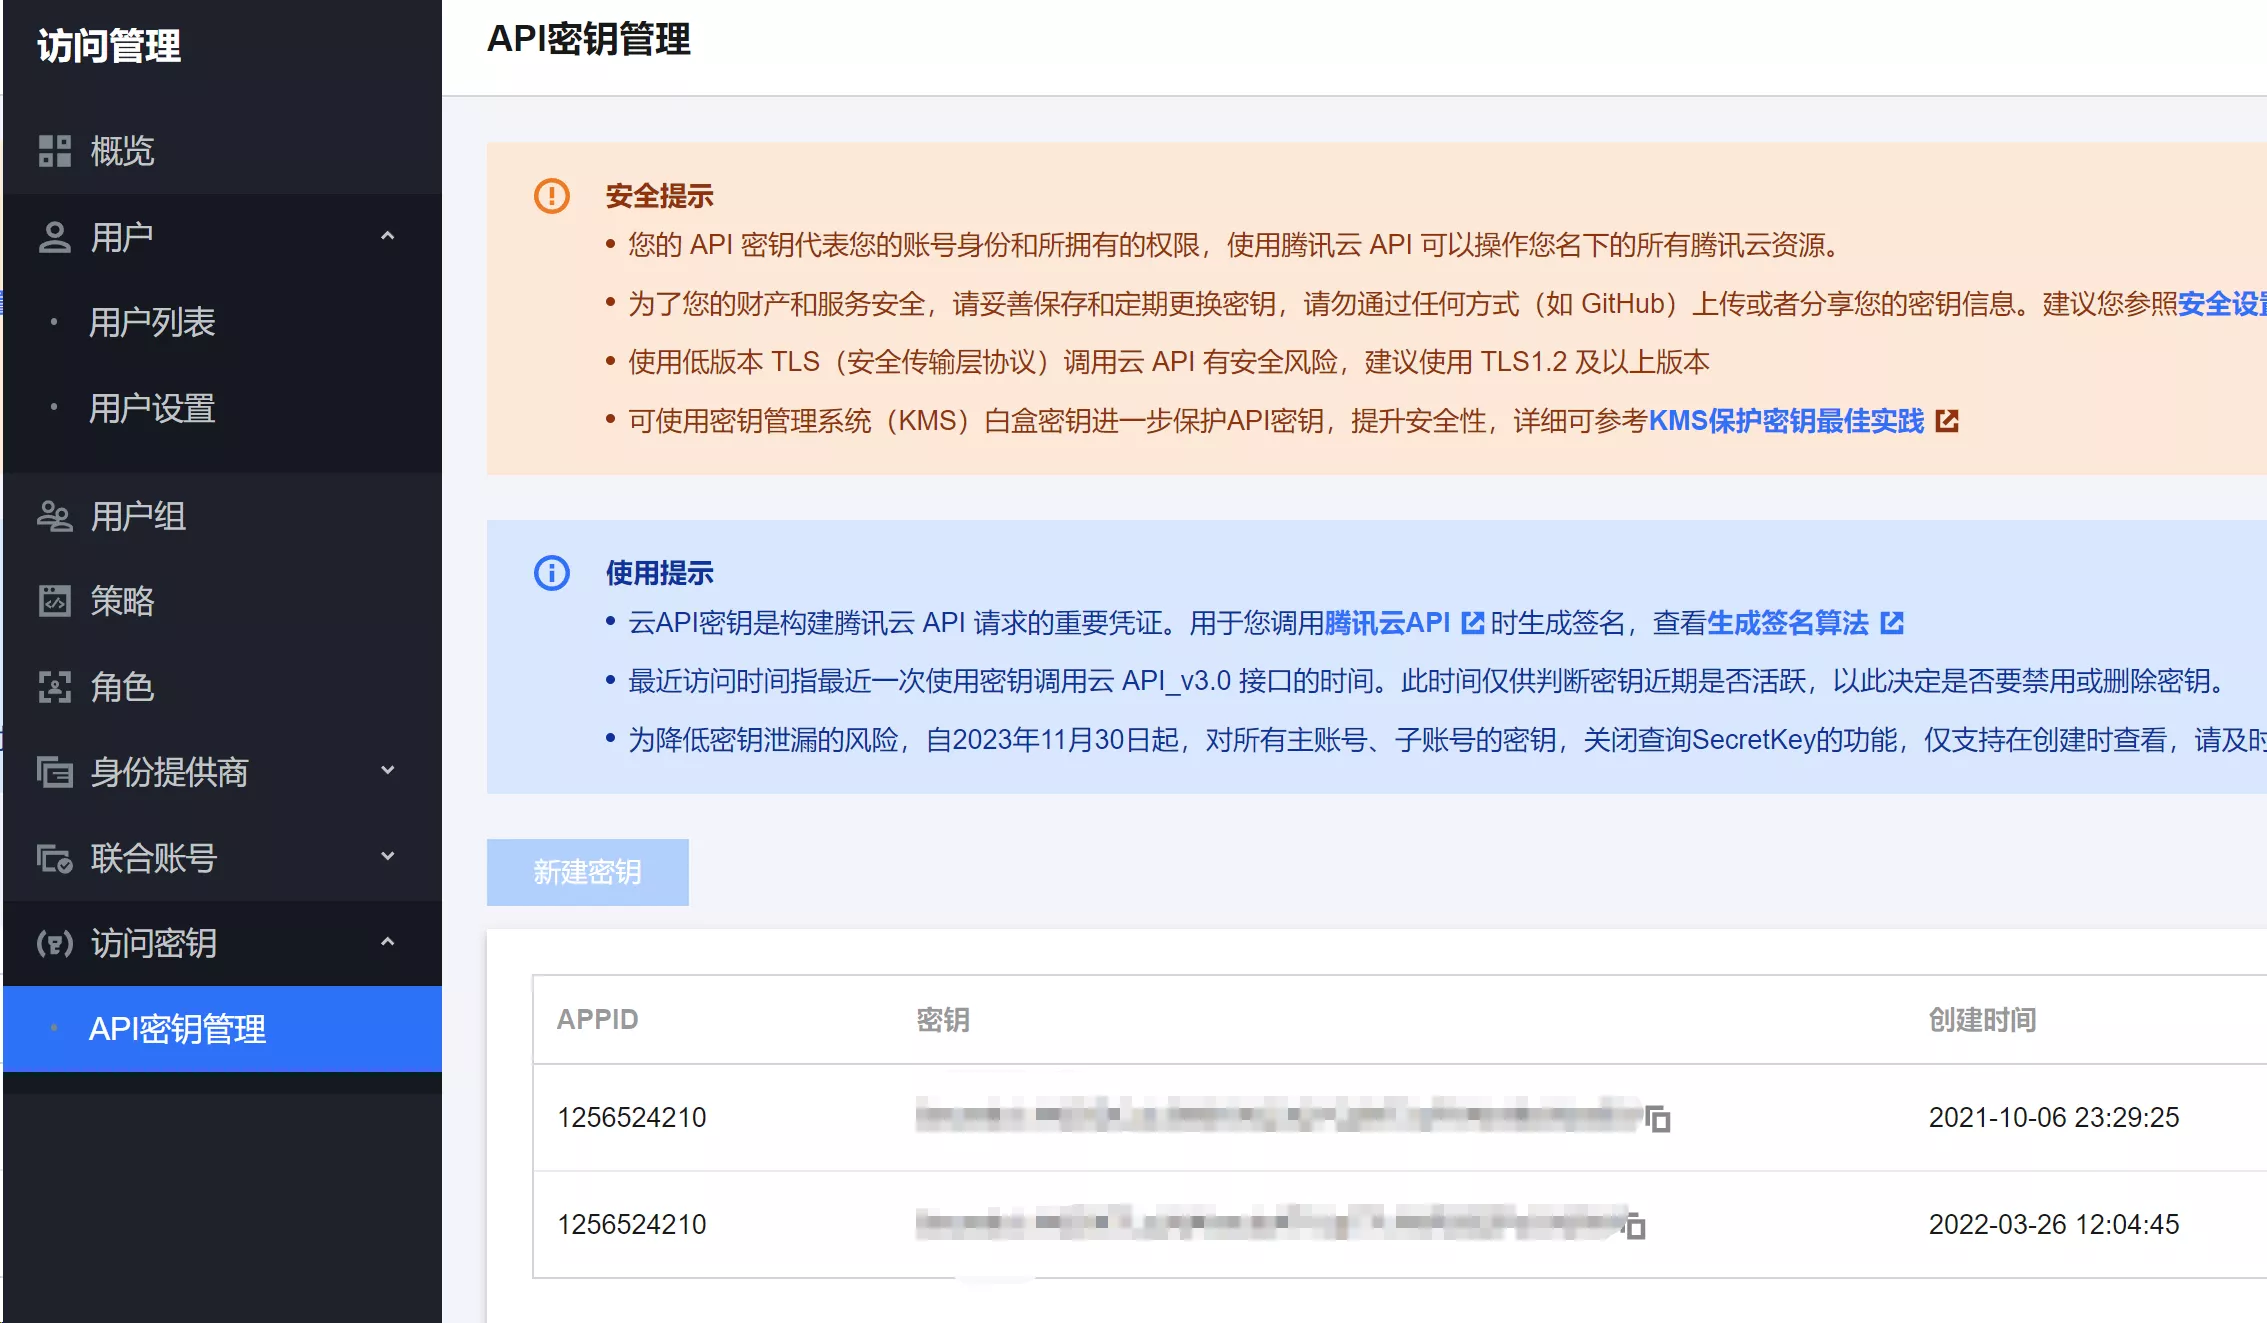
- 一定要注意防止密码泄露! 所以新建
application-local.yml文件,并且在.gitignore中忽略该文件的提交,这样就不会将代码等敏感配置提交到代码仓库了 accessKey、secretKey密钥对:在腾讯云访问管理 => 密钥管理中获取
- 一定要注意防止密码泄露! 所以新建
# 本地配置文件
# 对象存储
cos:
  client:
    accessKey: xxx
    secretKey: xxx
    region: xxx
    bucket: xxx
region:表示地域名bucket:是存储桶名
2. 通用能力类 Manager
CosManager 类,提供通用的对象存储操作(eg:文件上传、文件下载等),供其他代码调用
@Component
public class CosManager {

    @Resource
    private CosClientConfig cosClientConfig;

    @Resource
    private COSClient cosClient;

    // ... 一些操作 COS 的方法
}
3. 文件上传
CosManager新增两个上传对象的方法
@Component
public class CosManager {

    @Resource
    private CosClientConfig cosClientConfig;

    @Resource
    private COSClient cosClient;

    /**
     * 上传对象
     *
     * @param key           唯一键
     * @param localFilePath 本地文件路径
     */
    public PutObjectResult putObject(String key, String localFilePath) {
        PutObjectRequest putObjectRequest = new PutObjectRequest(
            cosClientConfig.getBucket(), key, new File(localFilePath));
        return cosClient.putObject(putObjectRequest);
    }

    /**
     * 上传对象
     *
     * @param key  唯一键
     * @param file 文件
     */
    public PutObjectResult putObject(String key, File file) {
        PutObjectRequest putObjectRequest = new PutObjectRequest(
            cosClientConfig.getBucket(), key, file);
        return cosClient.putObject(putObjectRequest);
    }
}
- 修改
FileConstant常量中的 COS 访问域名,便于接下来测试访问已上传的文件
package com.yupi.web.constant;
/**
* 文件常量
*/
public interface FileConstant {
/**
* COS 访问地址
* todo 需替换配置
*/
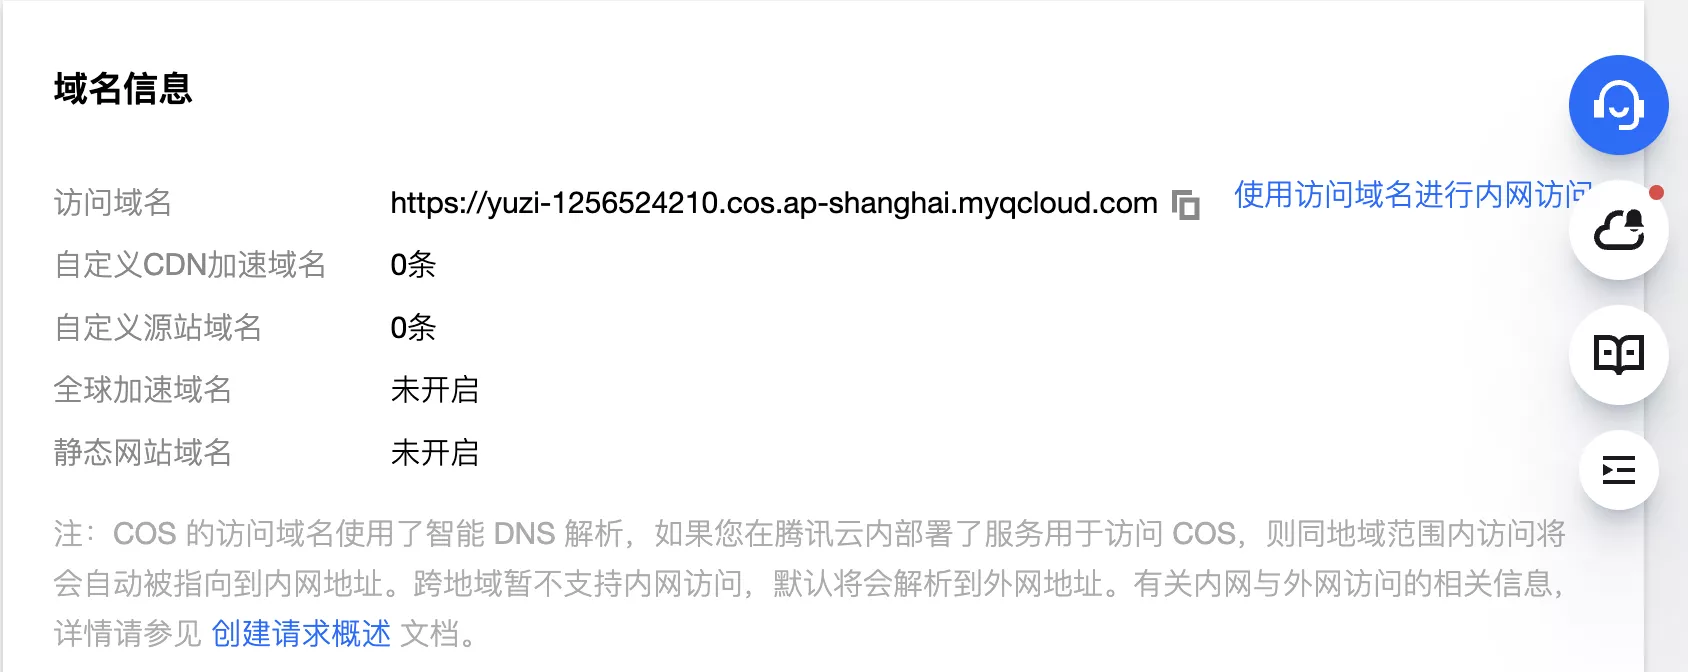
String COS_HOST = "https://yuzi-1256524210.cos.ap-shanghai.myqcloud.com";
}
该域名可以在 COS 控制台的域名信息部分找到:
- 为了方便测试,在
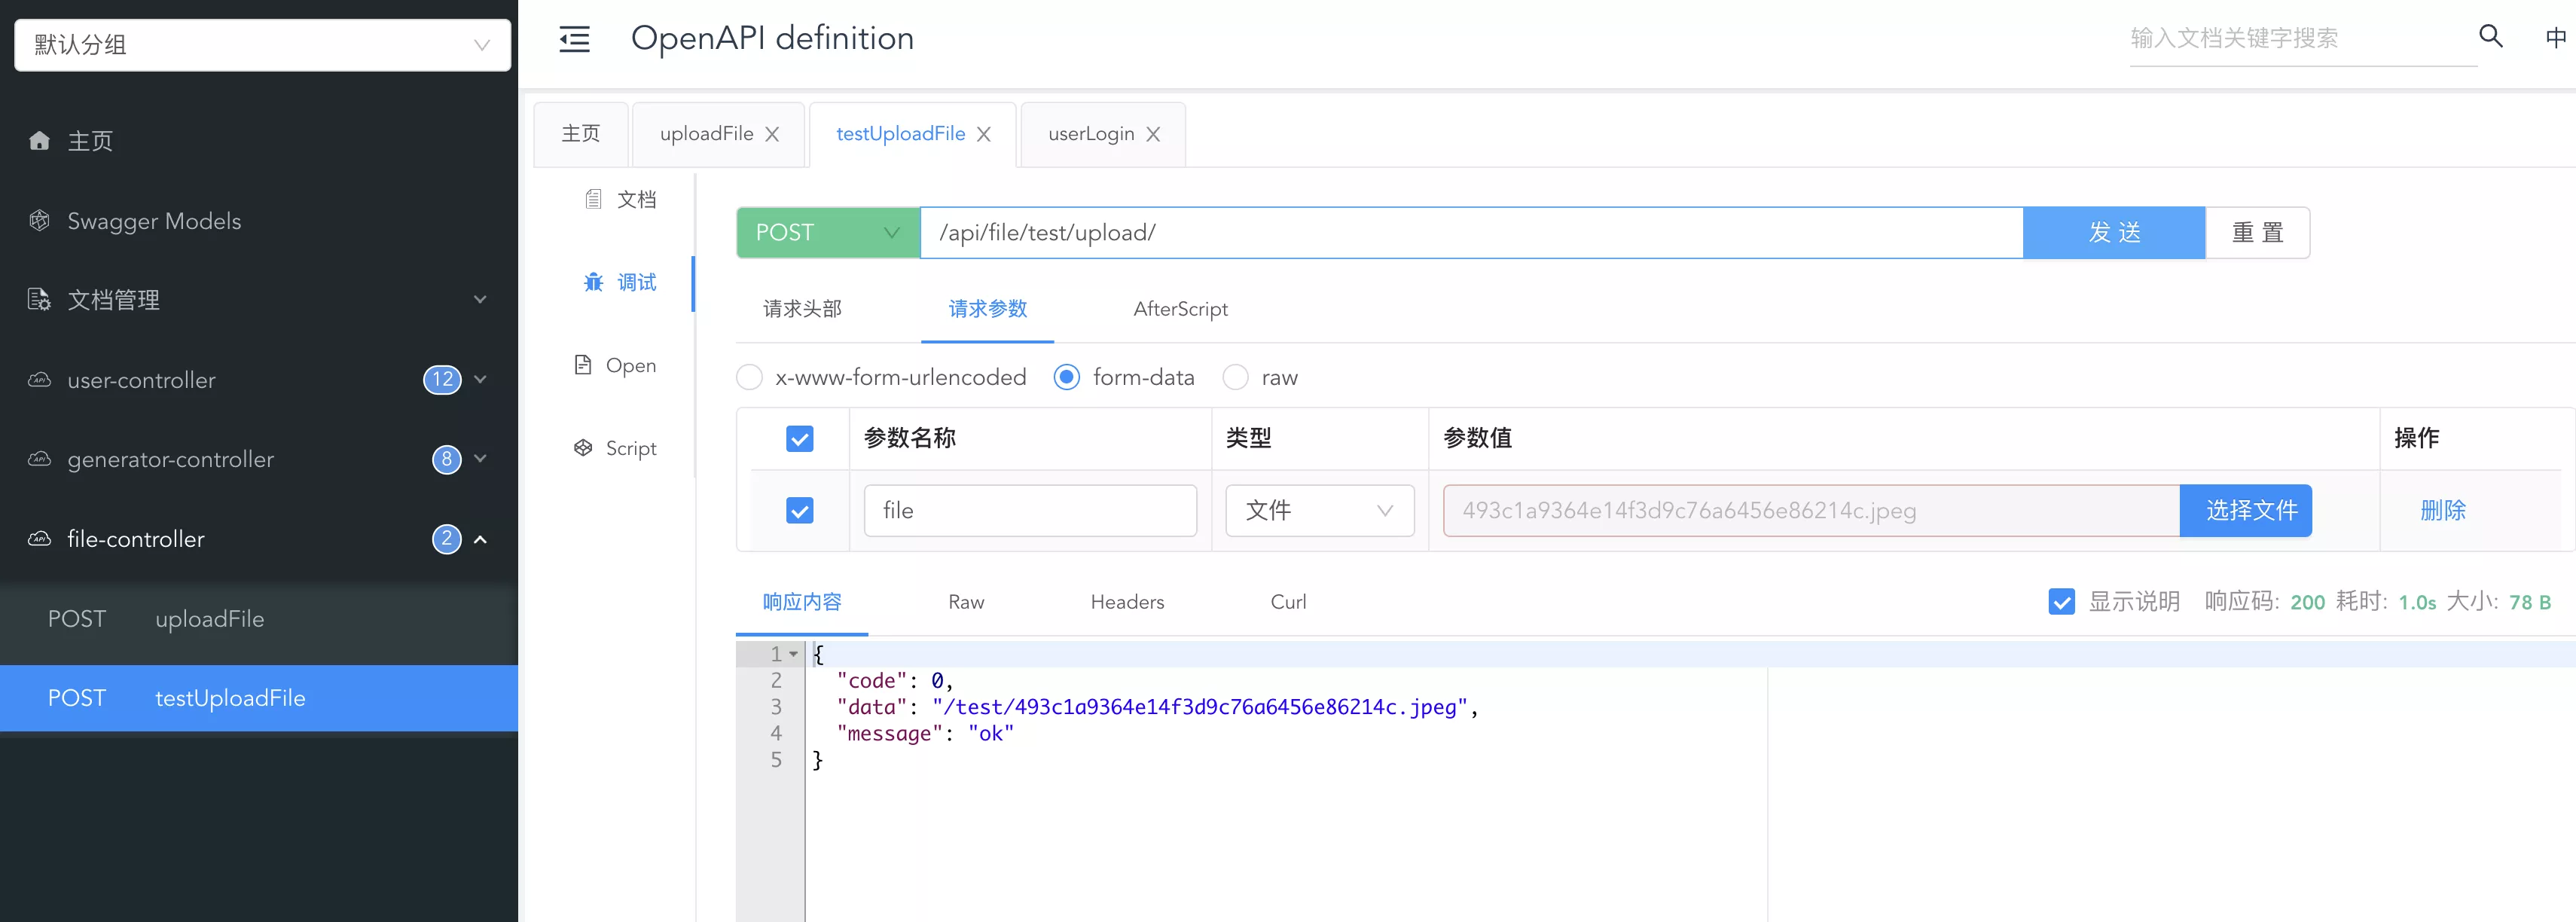
FileController中编写测试文件上传接口- 注意:测试接口一定要加上管理员权限!防止任何用户随意上传文件
/**
 * 测试文件上传
 */
@AuthCheck(mustRole = UserConstant.ADMIN_ROLE)
@PostMapping("/test/upload")
public BaseResponse<String> testUploadFile(@RequestPart("file") MultipartFile multipartFile) {
    // 文件目录
    String filename = multipartFile.getOriginalFilename();
    String filepath = String.format("/test/%s", filename);
    File file = null;
    try {
        // 上传文件
        file = File.createTempFile(filepath, null);
        multipartFile.transferTo(file);
        cosManager.putObject(filepath, file);
        // 返回可访问地址
        return ResultUtils.success(filepath);
    } catch (Exception e) {
        log.error("file upload error, filepath = " + filepath, e);
        throw new BusinessException(ErrorCode.SYSTEM_ERROR, "上传失败");
    } finally {
        if (file != null) {
            // 删除临时文件
            boolean delete = file.delete();
            if (!delete) {
                log.error("file delete error, filepath = {}", filepath);
            }
        }
    }
}
- 打开 Swagger 接口文档
4. 文件下载
官方文档介绍了 2 种文件下载方式,对象存储>SDK 文档>Java SDK>快速入门
- 直接下载 COS 的文件到后端服务器(适合服务器端处理文件)
- 获取到文件下载输入流(适合返回给前端用户)
- 直接通过路径链接访问。适用于单一的、可以被用户公开访问的资源(eg:用户头像、本项目中的代码生成器图片)
- 首先在
CosManager中新增对象下载方法,根据对象的 key 获取存储信息:
/**
 * 下载对象
 *
 * @param key 唯一键
 */
public COSObject getObject(String key) {
    GetObjectRequest getObjectRequest = new GetObjectRequest(cosClientConfig.getBucket(), key);
    return cosClient.getObject(getObjectRequest);
}
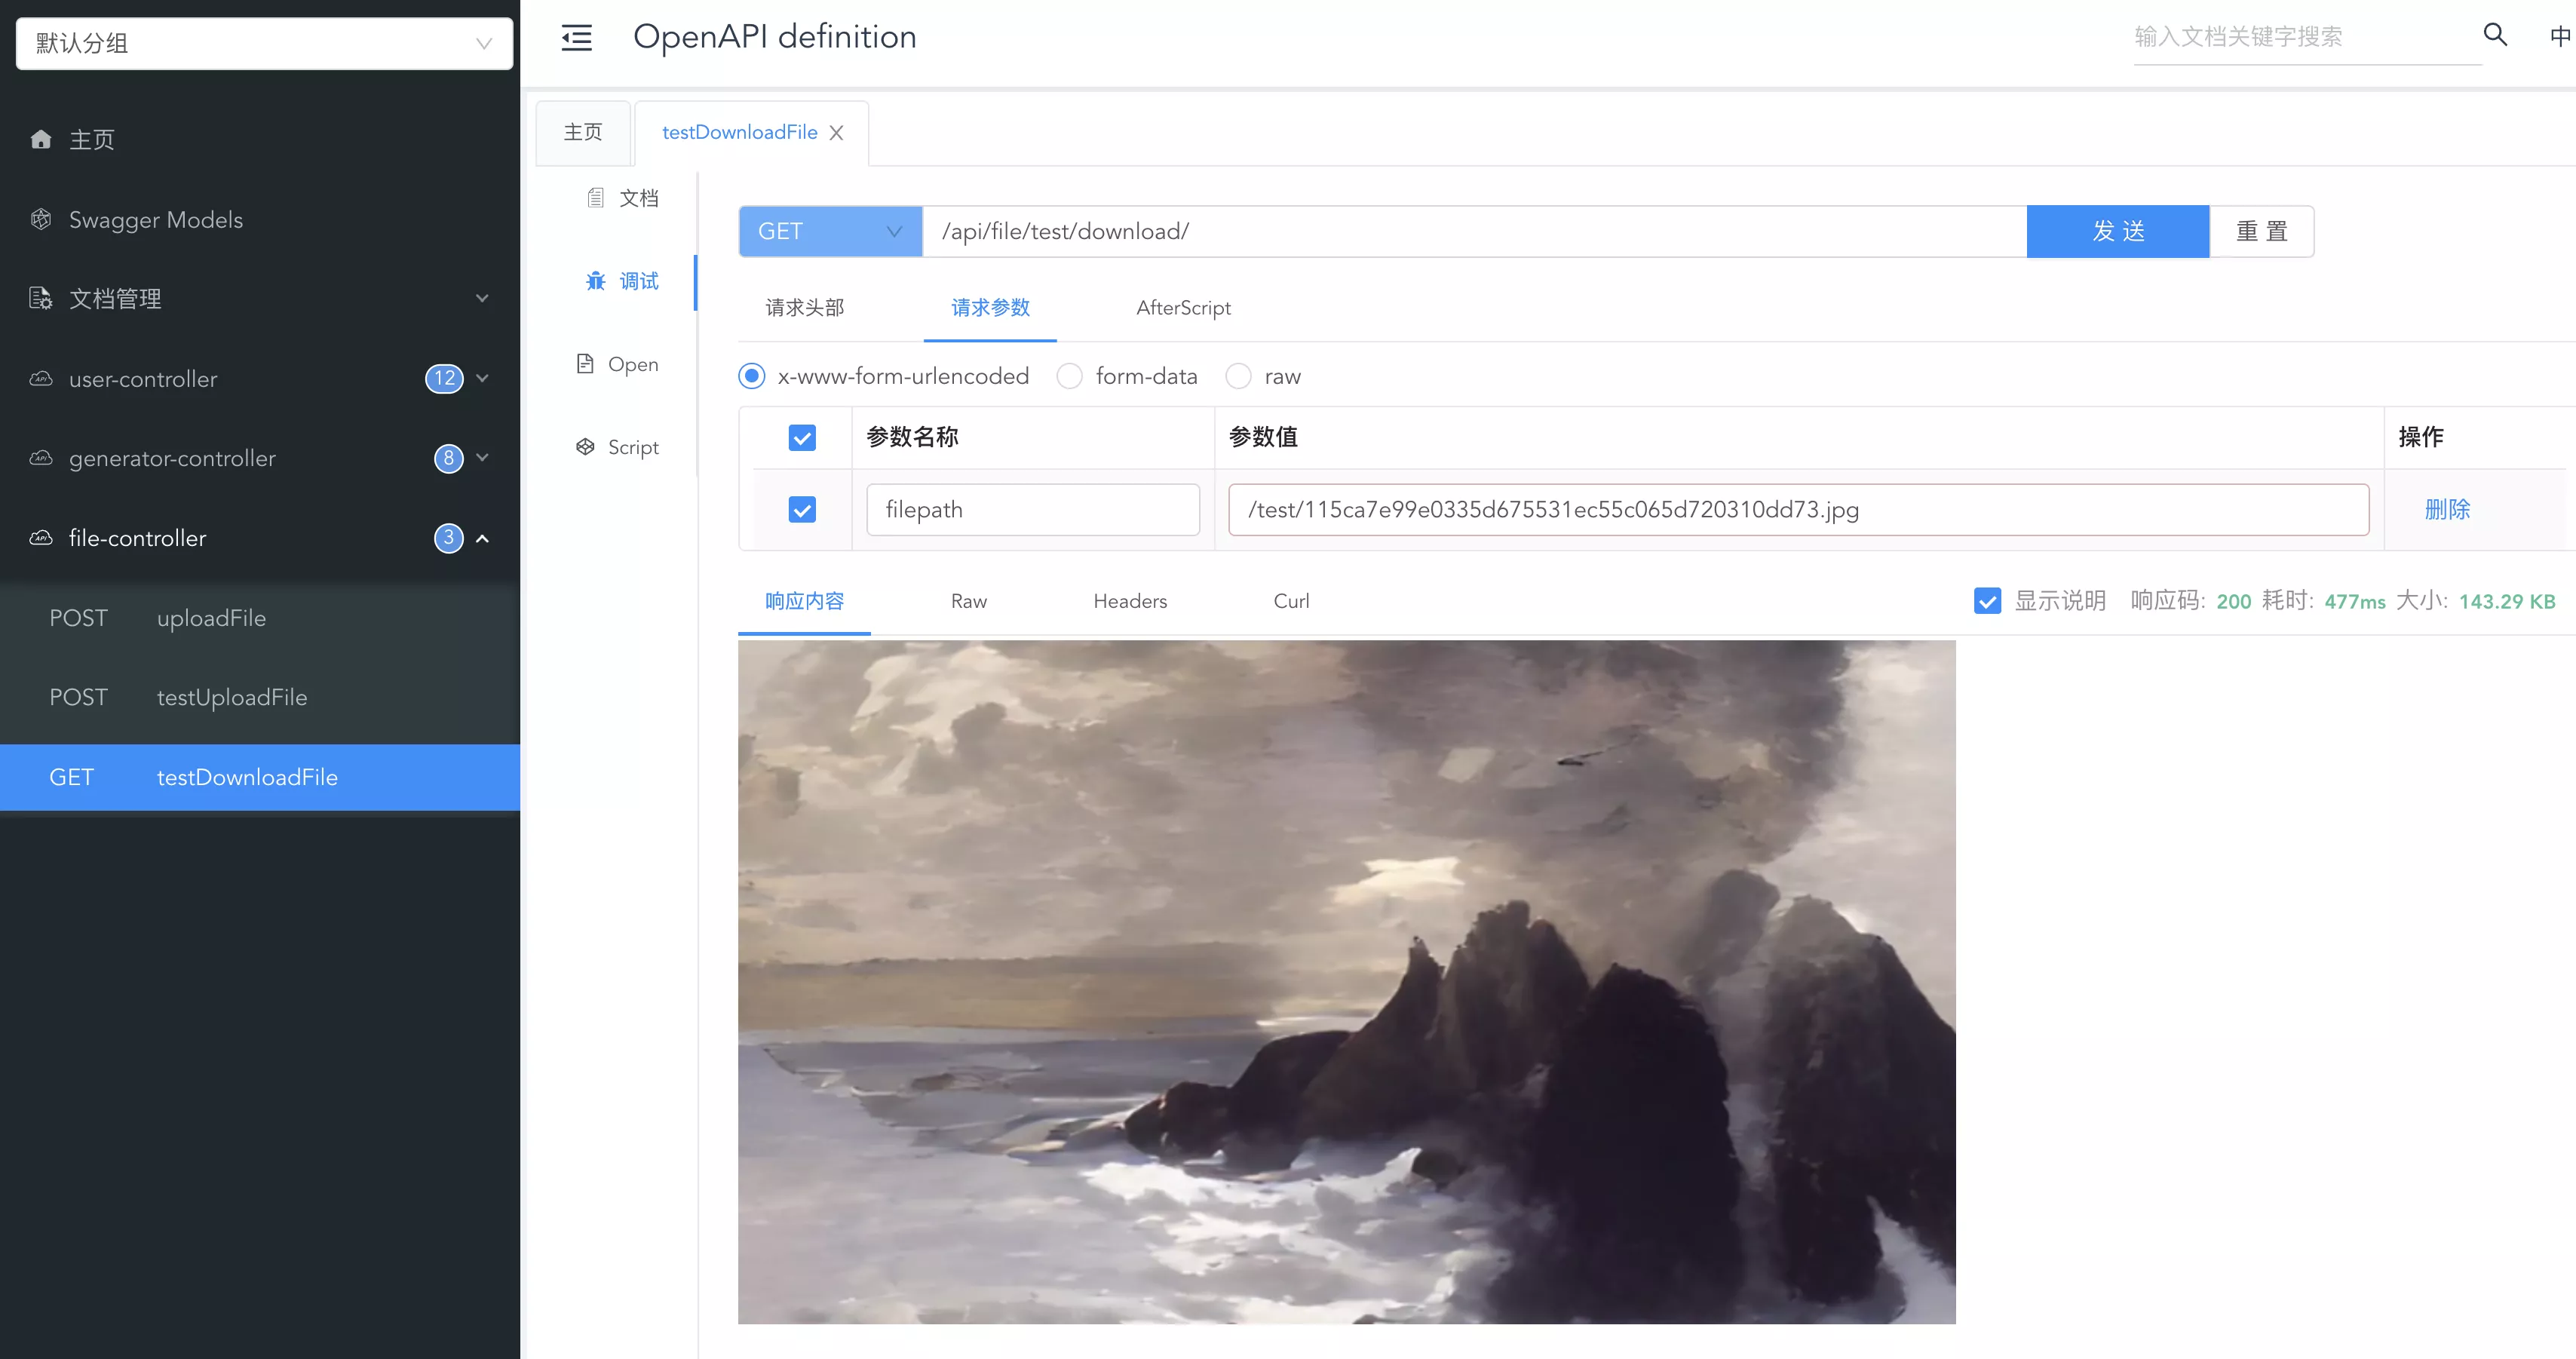
- 为了方便测试,在
FileController中编写测试文件下载接口- 测试接口一定要加上管理员权限!防止任何用户随意上传文件
/**
 * 测试文件下载
 *
 * @param filepath
 * @param response
 */
@AuthCheck(mustRole = UserConstant.ADMIN_ROLE)
@GetMapping("/test/download/")
public void testDownloadFile(String filepath, HttpServletResponse response) throws IOException {
    COSObjectInputStream cosObjectInput = null;
    try {
        COSObject cosObject = cosManager.getObject(filepath);
        cosObjectInput = cosObject.getObjectContent();
        // 处理下载到的流
        byte[] bytes = IOUtils.toByteArray(cosObjectInput);
        // 设置响应头
        response.setContentType("application/octet-stream;charset=UTF-8");
        response.setHeader("Content-Disposition", "attachment; filename=" + filepath);
        // 写入响应
        response.getOutputStream().write(bytes);
        response.getOutputStream().flush();
    } catch (Exception e) {
        log.error("file download error, filepath = " + filepath, e);
        throw new BusinessException(ErrorCode.SYSTEM_ERROR, "下载失败");
    } finally {
        if (cosObjectInput != null) {
            cosObjectInput.close();
        }
    }
}
- 启动项目,打开 Swagger 接口文档,测试文件下载:
4. 前端文件上传 / 下载
- 使用 OpenAPI 工具生成接口
- 新建文件上传下载测试页面,并添加路由:
{
  path: '/test/file',
  icon: 'home',
  component: './Test/File',
  name: '文件上传下载测试',
  hideInMenu: true,
},

- 新增对象存储相关常量。
constants/index.ts
/**
 * COS 访问地址
 */
export const COS_HOST = "https://yuzi-1256524210.cos.ap-shanghai.myqcloud.com";
- 开发页面
- 遵循 Flex 左右布局,左边上传文件,右边展示和下载文件
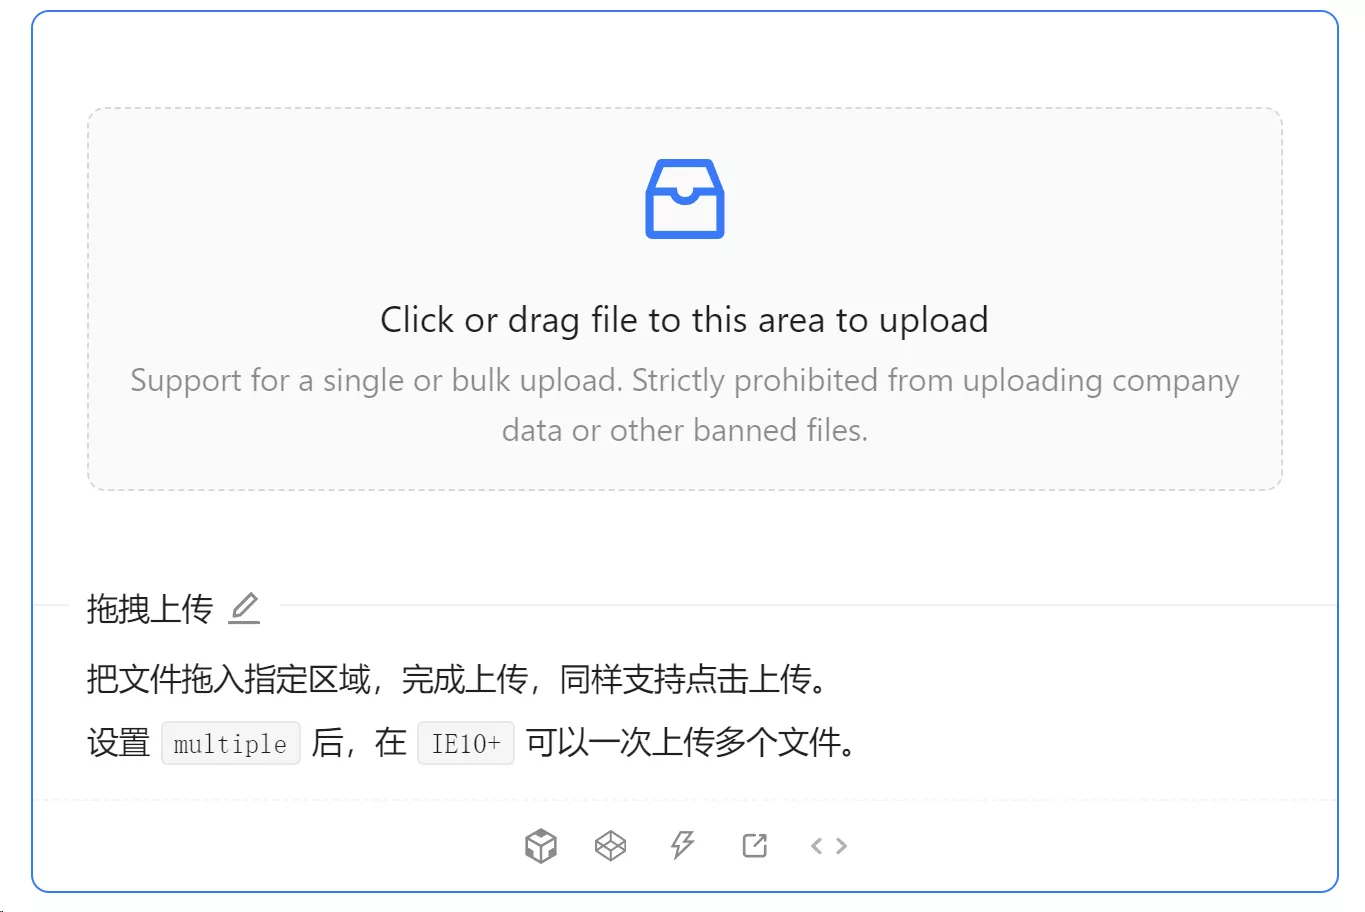
- 对于文件上传,直接使用 Ant Design 的拖拽文件上传组件,Upload 上传
使用 file-saver 库,可以下载后端返回的 blob 内容为文件
npm install file-saver

# 类型校验只在开发时用到
npm i --save-dev @types/file-saver
后端下载文件接口不返回 code 状态码,修改 requestConfig.ts 响应拦截器,对于文件下载请求,直接返回 blob 对象
// 响应拦截器
responseInterceptors: [
  (response) => {
    // 请求地址
    const requestPath: string = response.config.url ?? '';

    // 响应
    const { data } = response as unknown as ResponseStructure;
    if (!data) {
      throw new Error('服务异常');
    }

    // 文件下载时,直接返回
    if (requestPath.includes("download")) {
      return response;
    }

  	...
  },
]
import { COS_HOST } from '@/constants';
import {
  testDownloadFileUsingGet,
  testUploadFileUsingPost,
} from '@/services/backend/fileController';
import { InboxOutlined } from '@ant-design/icons';
import { Button, Card, Divider, Flex, message, Upload, UploadProps } from 'antd';
import { saveAs } from 'file-saver';
import React, { useState } from 'react';

const { Dragger } = Upload;

/**
 * 文件上传下载测试页面
 * @constructor
 */
const TestFilePage: React.FC = () => {
  const [value, setValue] = useState<string>();

  const props: UploadProps = {
    name: 'file',
    multiple: false,
    maxCount: 1,
    customRequest: async (fileObj: any) => {
      try {
        const res = await testUploadFileUsingPost({}, fileObj.file);
        fileObj.onSuccess(res.data);
        setValue(res.data);
      } catch (e: any) {
        message.error('上传失败,' + e.message);
        fileObj.onError(e);
      }
    },
    onRemove() {
      setValue(undefined);
    },
  };

  return (
    <Flex gap={16}>
      <Card title="文件上传">
        <Dragger {...props}>
          <p className="ant-upload-drag-icon">
            <InboxOutlined />
          </p>
          <p className="ant-upload-text">Click or drag file to this area to upload</p>
          <p className="ant-upload-hint">
            Support for a single or bulk upload. Strictly prohibited from uploading company data or
            other banned files.
          </p>
        </Dragger>
      </Card>
      <Card title="文件下载" loading={!value}>
        <div>文件地址:{COS_HOST + value}</div>
        <Divider />
        <img src={COS_HOST + value} height={280} />
        <Divider />
        <Button
          onClick={async () => {
            const blob = await testDownloadFileUsingGet(
              {
                filepath: value,
              },
              {
                responseType: 'blob',
              },
            );
            // 使用 file-saver 来保存文件
            const fullPath = COS_HOST + value;
            saveAs(blob, fullPath.substring(fullPath.lastIndexOf('/') + 1));
          }}
        >
          点击下载文件
        </Button>
      </Card>
    </Flex>
  );
};

export default TestFilePage;
- 测试文件上传、显示和下载

3. 创建代码生成器功能
先开发后端,创建代码生成器页面依赖的接口如下:
- 创建代码生成器
- 文件上传,包括上传代码生成器的图片和 dist 产物包
- 现在得到的代码生成器成品是一个 dist 目录,包含多个文件。上传、下载多文件不方便,所以需要对目录进行压缩打包
1. 文件压缩打包
如何压缩打包文件呢?有 2 种方案:
- 使用 COS 自带的能力,上传文件后执行压缩打包任务。文档中心>对象存储>SDK 文档>Java SDK>文件处理>
- 在制作工具生成代码生成器产物包时,同时得到一个压缩包文件。更推荐这种方式
首先修改制作工具 maker 项目的 GenerateTemplate.java 文件。新增一个制作压缩包的方法,可供子类调用
/**
 * 制作压缩包
 *
 * @param outputPath
 * @return 压缩包路径
 */
protected String buildZip(String outputPath) {
    String zipPath = outputPath + ".zip";
    ZipUtil.zip(outputPath, zipPath);
    return zipPath;
}
然后修改模板类的 buildDist 方法,返回 dist 包的文件路径。同步修改 MainGenerator 的返回值
/**
 * 生成精简版程序
 * @return 产物包路径
 */
protected String buildDist(String outputPath, String sourceCopyDestPath, String jarPath, String shellOutputFilePath) {
    String distOutputPath = outputPath + "-dist";
    // 拷贝 jar 包
    String targetAbsolutePath = distOutputPath + File.separator + "target";
    FileUtil.mkdir(targetAbsolutePath);
    String jarAbsolutePath = outputPath + File.separator + jarPath;
    FileUtil.copy(jarAbsolutePath, targetAbsolutePath, true);
    // 拷贝脚本文件
    FileUtil.copy(shellOutputFilePath, distOutputPath, true);
    // 拷贝源模板文件
    FileUtil.copy(sourceCopyDestPath, distOutputPath, true);
    return distOutputPath;
}
在 maker.generator.main 包下,新增压缩包生成器 ZipGenerator 子类,同时生成产物包和压缩包
package com.yupi.maker.generator.main;

/**
 * 生成代码生成器压缩包
 */
public class ZipGenerator extends GenerateTemplate {

    @Override
    protected String buildDist(String outputPath, String sourceCopyDestPath, String jarPath, String shellOutputFilePath) {
        String distPath = super.buildDist(outputPath, sourceCopyDestPath, jarPath, shellOutputFilePath);
        return super.buildZip(distPath);
    }
}
最后修改主类的 main 方法,测试生成代码生成器的压缩包
public class Main {

    public static void main(String[] args) throws TemplateException, IOException, InterruptedException {
        // GenerateTemplate generateTemplate = new MainGenerator();
        GenerateTemplate generateTemplate = new ZipGenerator();
        generateTemplate.doGenerate();
    }
}

2. 文件上传接口
在 FileController 中编写文件上传接口
- 修改方法的返回值,不再拼接
FileConstant.COS_HOST,而是直接返回 filepath 相对路径,便于后续直接根据 filepath 下载 - 更方便地管理文件,引入了
biz参数,用来区分业务,不同业务的文件上传到不同的目录中。后面甚至还可以根据目录来设置不同的访问权限,提高安全性
/**
 * 文件上传
 *
 * @param multipartFile
 * @param uploadFileRequest
 * @param request
 * @return
 */
@PostMapping("/upload")
public BaseResponse<String> uploadFile(@RequestPart("file") MultipartFile multipartFile,
                                       UploadFileRequest uploadFileRequest, HttpServletRequest request) {
    String biz = uploadFileRequest.getBiz();
    FileUploadBizEnum fileUploadBizEnum = FileUploadBizEnum.getEnumByValue(biz);
    if (fileUploadBizEnum == null) {
        throw new BusinessException(ErrorCode.PARAMS_ERROR);
    }
    validFile(multipartFile, fileUploadBizEnum);
    User loginUser = userService.getLoginUser(request);
    // 文件目录:根据业务、用户来划分
    String uuid = RandomStringUtils.randomAlphanumeric(8);
    String filename = uuid + "-" + multipartFile.getOriginalFilename();
    String filepath = String.format("/%s/%s/%s", fileUploadBizEnum.getValue(), loginUser.getId(), filename);
    File file = null;
    try {
        // 上传文件
        file = File.createTempFile(filepath, null);
        multipartFile.transferTo(file);
        cosManager.putObject(filepath, file);
        // 返回可访问地址
        return ResultUtils.success(filepath);
    } catch (Exception e) {
        log.error("file upload error, filepath = " + filepath, e);
        throw new BusinessException(ErrorCode.SYSTEM_ERROR, "上传失败");
    } finally {
        if (file != null) {
            // 删除临时文件
            boolean delete = file.delete();
            if (!delete) {
                log.error("file delete error, filepath = {}", filepath);
            }
        }
    }
}
修改 FileUploadBizEnum 枚举类,增加几种业务类型
public enum FileUploadBizEnum {

    USER_AVATAR("用户头像", "user_avatar"),
    GENERATOR_PICTURE("生成器图片", "generator_picture"),
    GENERATOR_DIST("生成器产物包", "generator_dist");

    private final String text;

    private final String value;

    FileUploadBizEnum(String text, String value) {
        this.text = text;
        this.value = value;
    }

    /**
     * 获取值列表
     *
     * @return
     */
    public static List<String> getValues() {
        return Arrays.stream(values()).map(item -> item.value).collect(Collectors.toList());
    }

    /**
     * 根据 value 获取枚举
     *
     * @param value
     * @return
     */
    public static FileUploadBizEnum getEnumByValue(String value) {
        if (ObjectUtils.isEmpty(value)) {
            return null;
        }
        for (FileUploadBizEnum anEnum : FileUploadBizEnum.values()) {
            if (anEnum.value.equals(value)) {
                return anEnum;
            }
        }
        return null;
    }

    public String getValue() {
        return value;
    }

    public String getText() {
        return text;
    }
}
3. 通用文件上传组件
了解 Ant Design 组件库的运行机制
- eg:此处需要遵循自定义表单控件的 规范.根据规范,我们要给组件指定
value和onChange两个属性 - 分别需要开发文件上传和图片上传 2 个组件
1. 文件上传组件
组件接收值类型为 UploadFile[] 文件列表,还可以接受外层传来的描述(description),让用户自定义描述信息
import { uploadFileUsingPost } from '@/services/backend/fileController';
import { InboxOutlined } from '@ant-design/icons';
import { message, UploadFile, UploadProps } from 'antd';
import Dragger from 'antd/es/upload/Dragger';
import React, { useState } from 'react';

interface Props {
  biz: string;
  onChange?: (fileList: UploadFile[]) => void;
  value?: UploadFile[];
  description?: string;
}

/**
 * 文件上传组件
 * @constructor
 */
const FileUploader: React.FC<Props> = (props) => {
  const { biz, value, description, onChange } = props;
  const [loading, setLoading] = useState(false);

  const uploadProps: UploadProps = {
    name: 'file',
    listType: 'text',
    multiple: false,
    maxCount: 1,
    fileList: value,
    disabled: loading,
    onChange: ({ fileList }) => {
      onChange?.(fileList);
    },
    customRequest: async (fileObj: any) => {
      setLoading(true);
      try {
        const res = await uploadFileUsingPost(
          {
            biz,
          },
          {},
          fileObj.file,
        );
        fileObj.onSuccess(res.data);
      } catch (e: any) {
        message.error('上传失败,' + e.message);
        fileObj.onError(e);
      }
      setLoading(false);
    },
  };

  return (
    <Dragger {...uploadProps}>
      <p className="ant-upload-drag-icon">
        <InboxOutlined />
      </p>
      <p className="ant-upload-text">点击或拖拽文件上传</p>
      <p className="ant-upload-hint">{description}</p>
    </Dragger>
  );
};

export default FileUploader;
数据库中存储的是产物包的 key,而不是文件对象。注意:在外层使用该组件时,要将文件对象和 key(或 url 地址)进行互转
2. 图片上传
参考 Ant Design 现有的 图片上传组件
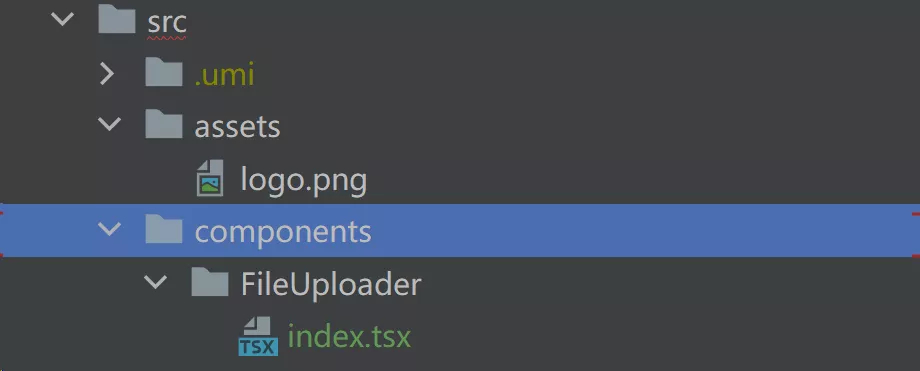
- 在
components组件目录下新建PictureUploader组件 - 相比于文件上传组件,增加了一个展示用户已上传的图片的逻辑。需要注意,文件上传接口返回的是相对路径,要拼接上
COS_HOST前缀,才能得到图片的完整路径

import { uploadFileUsingPost } from '@/services/backend/fileController';
import { LoadingOutlined, PlusOutlined } from '@ant-design/icons';
import { message, Upload, UploadProps } from 'antd';
import React, { useState } from 'react';
import {COS_HOST} from "@/constants";

interface Props {
  biz: string;
  onChange?: (url: string) => void;
  value?: string;
}

/**
 * 图片上传组件
 * @constructor
 */
const PictureUploader: React.FC<Props> = (props) => {
  const { biz, value, onChange } = props;
  const [loading, setLoading] = useState(false);

  const uploadProps: UploadProps = {
    name: 'file',
    listType: 'picture-card',
    multiple: false,
    maxCount: 1,
    showUploadList: false,
    customRequest: async (fileObj: any) => {
      setLoading(true);
      try {
        const res = await uploadFileUsingPost(
          {
            biz,
          },
          {},
          fileObj.file,
        );
        // 拼接完整图片路径
        const fullPath = COS_HOST + res.data;
        onChange?.(fullPath ?? '');
        fileObj.onSuccess(fullPath);
      } catch (e: any) {
        message.error('上传失败,' + e.message);
        fileObj.onError(e);
      }
      setLoading(false);
    },
  };

  const uploadButton = (
    <div>
      {loading ? <LoadingOutlined /> : <PlusOutlined />}
      <div style={{ marginTop: 8 }}>上传</div>
    </div>
  );

  return (
    <Upload {...uploadProps}>
      {value ? <img src={value} alt="picture" style={{ width: '100%' }} /> : uploadButton}
    </Upload>
  );
};

export default PictureUploader;
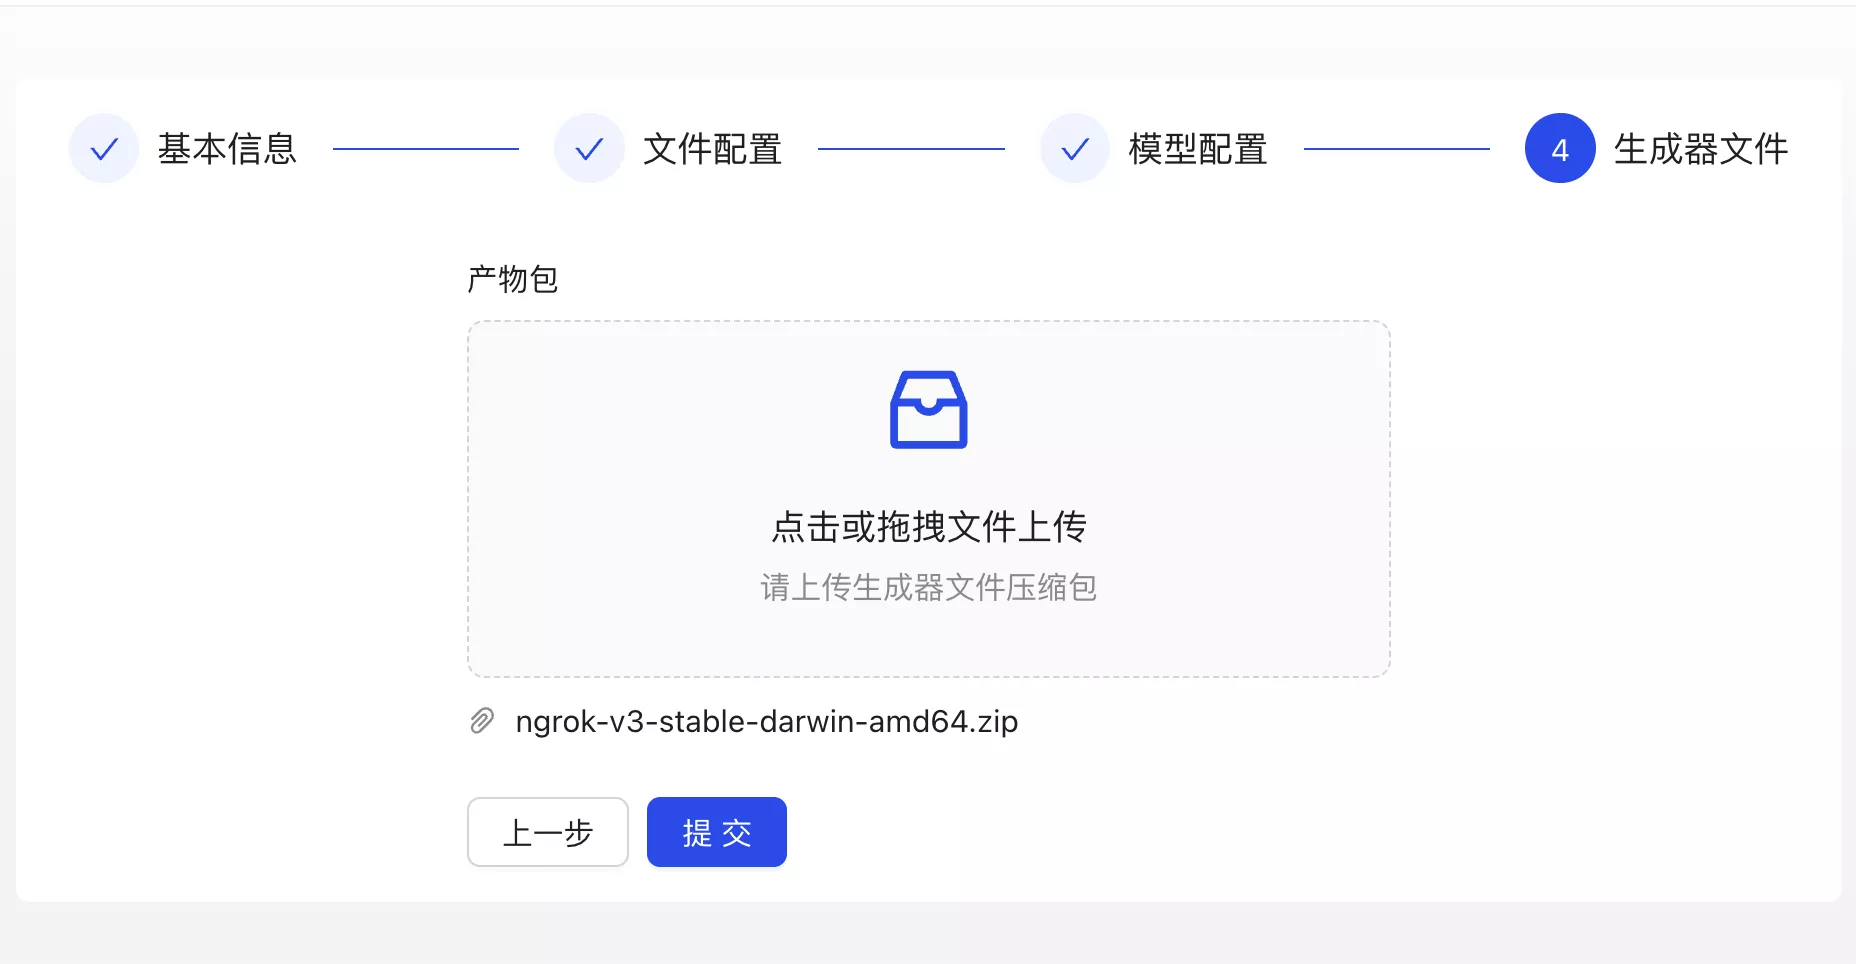
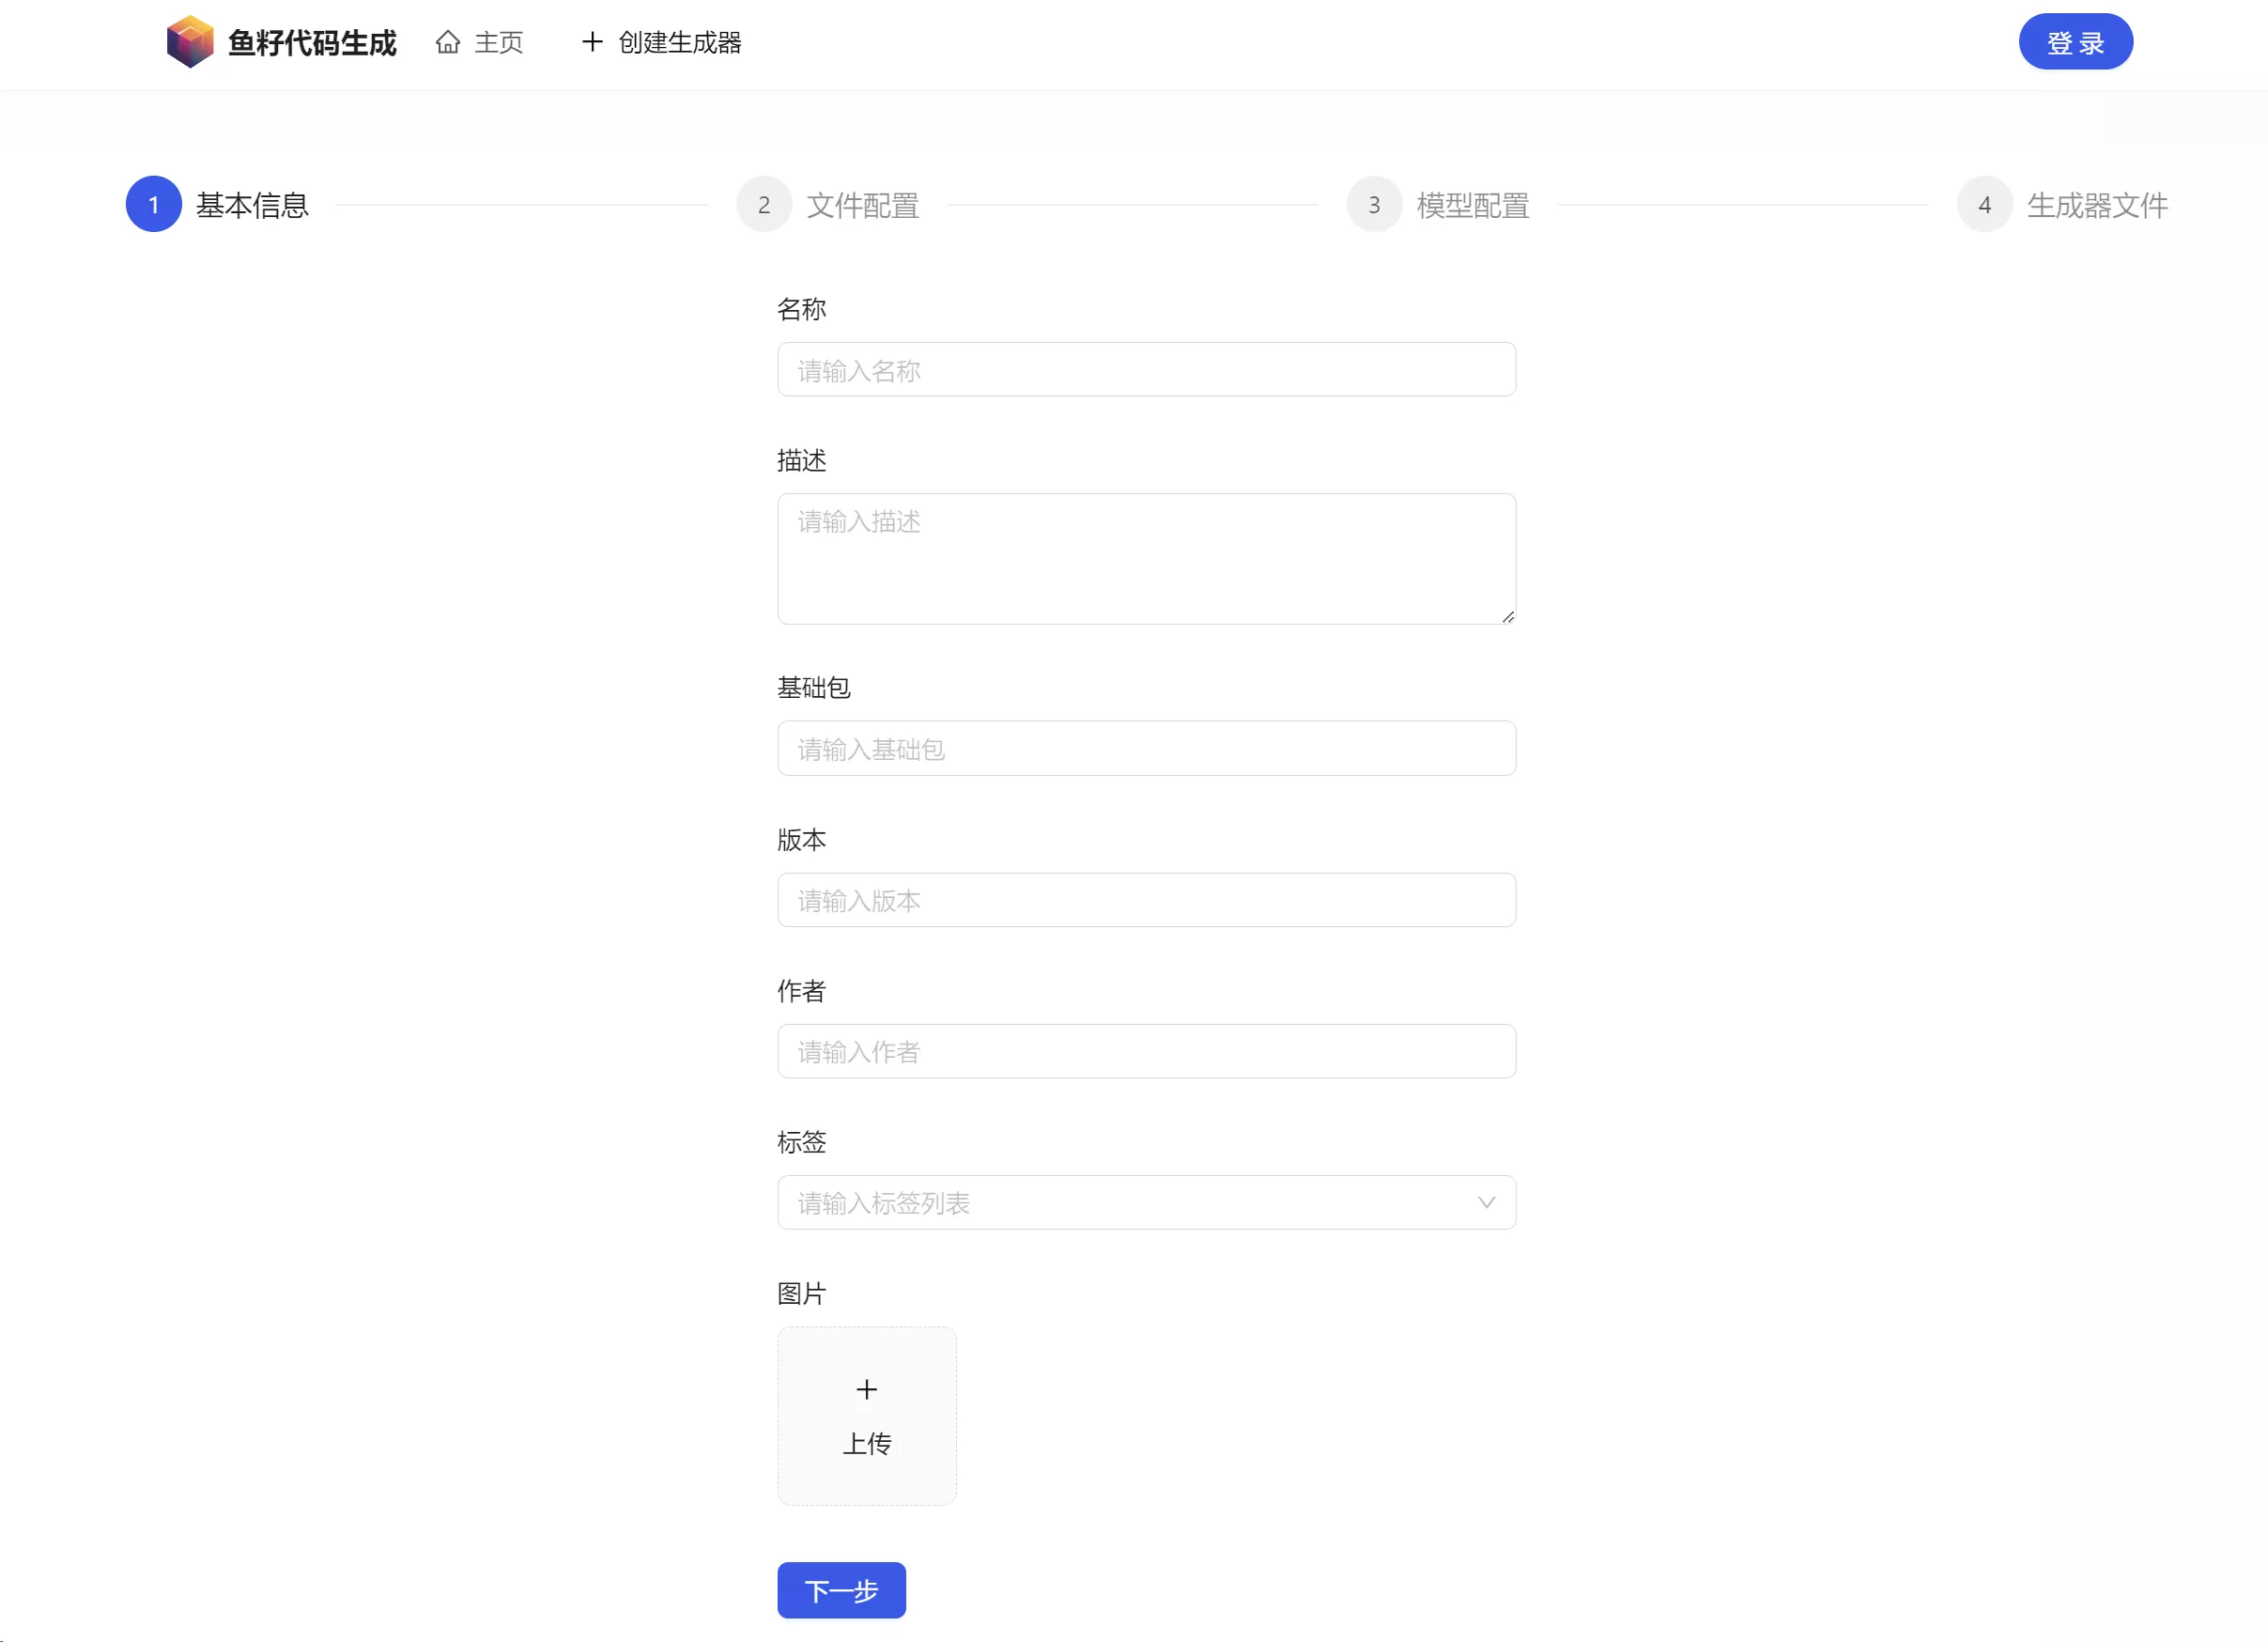
4. 创建页面开发
创建代码生成器时,需要填写的字段较多,所以使用分步表单。官方 Demo
- 新建路由和对应的页面文件:
  {
    path: '/generator/add',
    icon: 'plus',
    component: './Generator/Add',
    name: '创建生成器',
  },

- 先根据 Ant Design Procomponents 的分步表单组件,完成基本表单,实现基本的分步流程,并尝试输出用户填写的全部参数
- 先不编写 fileConfig 和 modelConfig 这些结构复杂的表单项
- 使用了通用上传组件,并通过指定不同的
biz参数,控制不同类别的文件上传到不同目录中
import FileUploader from '@/components/FileUploader';
import PictureUploader from '@/components/PictureUploader';
import { addGeneratorUsingPost } from '@/services/backend/generatorController';
import type { ProFormInstance } from '@ant-design/pro-components';
import {
  ProCard,
  ProFormSelect,
  ProFormText,
  ProFormTextArea,
  StepsForm,
} from '@ant-design/pro-components';
import { ProFormItem } from '@ant-design/pro-form';
import { message } from 'antd';
import React, { useRef } from 'react';

/**
 * 创建生成器页面
 * @constructor
 */
const GeneratorAddPage: React.FC = () => {
  const formRef = useRef<ProFormInstance>();

  return (
    <ProCard>
      <StepsForm<API.GeneratorAddRequest> formRef={formRef}>
        <StepsForm.StepForm
          name="base"
          title="基本信息"
          onFinish={async () => {
            console.log(formRef.current?.getFieldsValue());
            return true;
          }}
        >
          <ProFormText name="name" label="名称" placeholder="请输入名称" />
          <ProFormTextArea name="description" label="描述" placeholder="请输入描述" />
          <ProFormText name="basePackage" label="基础包" placeholder="请输入基础包" />
          <ProFormText name="version" label="版本" placeholder="请输入版本" />
          <ProFormText name="author" label="作者" placeholder="请输入作者" />
          <ProFormSelect label="标签" mode="tags" name="tags" placeholder="请输入标签列表" />
          <ProFormItem label="图片" name="picture">
            <PictureUploader biz="generator_picture" />
          </ProFormItem>
        </StepsForm.StepForm>
        <StepsForm.StepForm name="fileConfig" title="文件配置">
          {/*todo 待补充*/}
        </StepsForm.StepForm>
        <StepsForm.StepForm name="modelConfig" title="模型配置">
          {/*todo 待补充*/}
        </StepsForm.StepForm>
        <StepsForm.StepForm name="dist" title="生成器文件">
          <ProFormItem label="产物包" name="distPath">
            <FileUploader biz="generator_dist" description="请上传生成器文件压缩包" />
          </ProFormItem>
        </StepsForm.StepForm>
      </StepsForm>
    </ProCard>
  );
};

export default GeneratorAddPage;
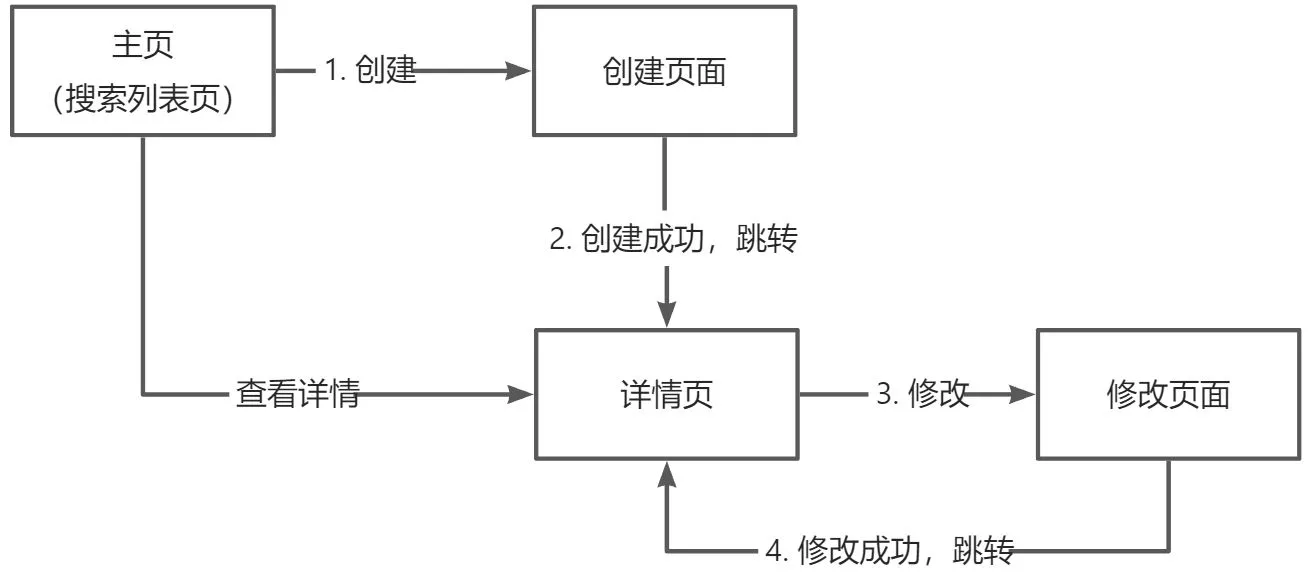
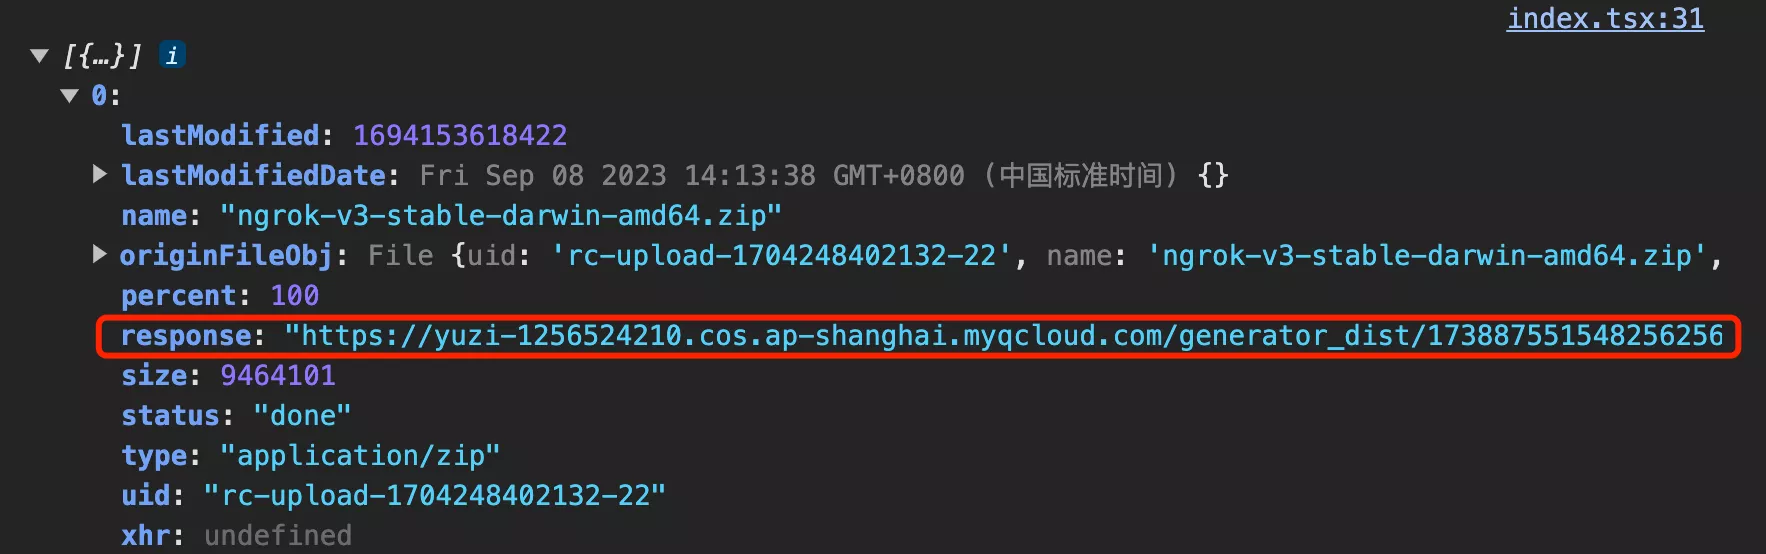
- 开发完基本页面后,编写提交函数,对用户填写的数据进行校验和转换(eg:将文件列表转换为 url),然后请求后端来创建生成器,创建成功后跳转到详情页
import FileUploader from '@/components/FileUploader';
import PictureUploader from '@/components/PictureUploader';
import { addGeneratorUsingPost } from '@/services/backend/generatorController';
import type { ProFormInstance } from '@ant-design/pro-components';
import {
  ProCard,
  ProFormSelect,
  ProFormText,
  ProFormTextArea,
  StepsForm,
} from '@ant-design/pro-components';
import { ProFormItem } from '@ant-design/pro-form';
import { history } from '@umijs/max';
import { message } from 'antd';
import React, { useRef } from 'react';

/**
 * 创建生成器页面
 * @constructor
 */
const GeneratorAddPage: React.FC = () => {
  const formRef = useRef<ProFormInstance>();

  /**
   * 提交
   * @param values
   */
  const doSubmit = async (values: API.GeneratorAddRequest) => {
    // 数据转换
    if (!values.fileConfig) {
      values.fileConfig = {};
    }
    if (!values.modelConfig) {
      values.modelConfig = {};
    }
    // 文件列表转 url
    if (values.distPath && values.distPath.length > 0) {
      // @ts-ignore
      values.distPath = values.distPath[0].response;
    }

    try {
      const res = await addGeneratorUsingPost(values);
      if (res.data) {
        message.success('创建成功');
        history.push(`/generator/detail/${res.data}`);
      }
    } catch (error: any) {
      message.error('创建失败,' + error.message);
    }
  };

  return (
    <ProCard>
      <StepsForm<API.GeneratorAddRequest> formRef={formRef} onFinish={doSubmit}>
        <StepsForm.StepForm
          name="base"
          title="基本信息"
          onFinish={async () => {
            console.log(formRef.current?.getFieldsValue());
            return true;
          }}
        >
          <ProFormText name="name" label="名称" placeholder="请输入名称" />
          <ProFormTextArea name="description" label="描述" placeholder="请输入描述" />
          <ProFormText name="basePackage" label="基础包" placeholder="请输入基础包" />
          <ProFormText name="version" label="版本" placeholder="请输入版本" />
          <ProFormText name="author" label="作者" placeholder="请输入作者" />
          <ProFormSelect label="标签" mode="tags" name="tags" placeholder="请输入标签列表" />
          <ProFormItem label="图片" name="picture">
            <PictureUploader biz="generator_picture" />
          </ProFormItem>
        </StepsForm.StepForm>
        <StepsForm.StepForm name="fileConfig" title="文件配置">
          {/*todo 待补充*/}
        </StepsForm.StepForm>
        <StepsForm.StepForm name="modelConfig" title="模型配置">
          {/*todo 待补充*/}
        </StepsForm.StepForm>
        <StepsForm.StepForm name="dist" title="生成器文件">
          <ProFormItem label="产物包" name="distPath">
            <FileUploader biz="generator_dist" description="请上传生成器文件压缩包" />
          </ProFormItem>
        </StepsForm.StepForm>
      </StepsForm>
    </ProCard>
  );
};

export default GeneratorAddPage;
5. 修改页面开发
直接在创建页面的基础上,支持读取老数据并修改的能力
- 新增修改页面路由,指向创建页面文件
  {
    path: '/generator/update',
    icon: 'plus',
    component: './Generator/Add',
    name: '修改生成器',
    hideInMenu: true,
  },
- 创建页面增加逻辑:通过 url 的查询参数传递要修改的数据 id,并且根据 id 查询老数据
- 比较关键的是将 distPath 从路径转换为文件上传组件的 UploadFile 对象,用于将之前上传过的文件回显在文件上传组件中。其中,url(打开链接)要补充 COS_HOST 前缀,而 response(实际的值)不用补充
const [searchParams] = useSearchParams();
const id = searchParams.get('id');
const [oldData, setOldData] = useState<API.GeneratorEditRequest>();
const formRef = useRef<ProFormInstance>();

/**
 * 加载数据
 */
const loadData = async () => {
  if (!id) {
    return;
  }
  try {
    const res = await getGeneratorVoByIdUsingGet({
      id,
    });

    // 处理文件路径
    if (res.data) {
      const { distPath } = res.data ?? {};
      if (distPath) {
        // @ts-ignore
        res.data.distPath = [
          {
            uid: id,
            name: '文件' + id,
            status: 'done',
            url: COS_HOST + distPath,
            response: distPath,
          } as UploadFile,
        ];
      }
      setOldData(res.data);
    }
  } catch (error: any) {
    message.error('加载数据失败,' + error.message);
  }
};

useEffect(() => {
  if (id) {
    loadData();
  }
}, [id]);

- 区分创建和修改
- 根据 id 是否存在来判断执行创建还是更新
/**
 * 创建
 * @param values
 */
const doAdd = async (values: API.GeneratorAddRequest) => {
  try {
    const res = await addGeneratorUsingPost(values);
    if (res.data) {
      message.success('创建成功');
      history.push(`/generator/detail/${res.data}`);
    }
  } catch (error: any) {
    message.error('创建失败,' + error.message);
  }
};

/**
 * 更新
 * @param values
 */
const doUpdate = async (values: API.GeneratorEditRequest) => {
  try {
    const res = await editGeneratorUsingPost(values);
    if (res.data) {
      message.success('更新成功');
      history.push(`/generator/detail/${id}`);
    }
  } catch (error: any) {
    message.error('更新失败,' + error.message);
  }
};

/**
 * 提交
 * @param values
 */
const doSubmit = async (values: API.GeneratorAddRequest) => {
  // 数据转换
  if (!values.fileConfig) {
    values.fileConfig = {};
  }
  if (!values.modelConfig) {
    values.modelConfig = {};
  }
  // 文件列表转 url
  if (values.distPath && values.distPath.length > 0) {
    // @ts-ignore
    values.distPath = values.distPath[0].response;
  }

  if (id) {
    await doUpdate({
      id,
      ...values,
    });
  } else {
    await doAdd(values);
  }
};
- 测试编写好的页面,会发现除了第一步之外的表单项,并没有回填默认值
- 控制表单的渲染时机,等要更新的老数据加载完成后,才渲染表单
{/* 创建或者已加载要更新的数据时,才渲染表单,顺利填充默认值 */}
{(!id || oldData) && (
  <StepsForm<API.GeneratorAddRequest | API.GeneratorEditRequest>
    formRef={formRef}
    formProps={{
      initialValues: oldData,
    }}
    onFinish={doSubmit}
  >
import FileUploader from '@/components/FileUploader';
import PictureUploader from '@/components/PictureUploader';
import { COS_HOST } from '@/constants';
import {
  addGeneratorUsingPost,
  editGeneratorUsingPost,
  getGeneratorVoByIdUsingGet,
} from '@/services/backend/generatorController';
import { useSearchParams } from '@@/exports';
import type { ProFormInstance } from '@ant-design/pro-components';
import {
  ProCard,
  ProFormSelect,
  ProFormText,
  ProFormTextArea,
  StepsForm,
} from '@ant-design/pro-components';
import { ProFormItem } from '@ant-design/pro-form';
import { history } from '@umijs/max';
import { message, UploadFile } from 'antd';
import React, { useEffect, useRef, useState } from 'react';

/**
 * 创建生成器页面
 * @constructor
 */
const GeneratorAddPage: React.FC = () => {
  const [searchParams] = useSearchParams();
  const id = searchParams.get('id');
  const [oldData, setOldData] = useState<API.GeneratorEditRequest>();
  const formRef = useRef<ProFormInstance>();

  /**
   * 加载数据
   */
  const loadData = async () => {
    if (!id) {
      return;
    }
    try {
      const res = await getGeneratorVoByIdUsingGet({
        id,
      });

      // 处理文件路径
      if (res.data) {
        const { distPath } = res.data ?? {};
        if (distPath) {
          // @ts-ignore
          res.data.distPath = [
            {
              uid: id,
              name: '文件' + id,
              status: 'done',
              url: COS_HOST + distPath,
              response: distPath,
            } as UploadFile,
          ];
        }
        setOldData(res.data);
      }
    } catch (error: any) {
      message.error('加载数据失败,' + error.message);
    }
  };

  useEffect(() => {
    if (id) {
      loadData();
    }
  }, [id]);

  /**
   * 创建
   * @param values
   */
  const doAdd = async (values: API.GeneratorAddRequest) => {
    try {
      const res = await addGeneratorUsingPost(values);
      if (res.data) {
        message.success('创建成功');
        history.push(`/generator/detail/${res.data}`);
      }
    } catch (error: any) {
      message.error('创建失败,' + error.message);
    }
  };

  /**
   * 更新
   * @param values
   */
  const doUpdate = async (values: API.GeneratorEditRequest) => {
    try {
      const res = await editGeneratorUsingPost(values);
      if (res.data) {
        message.success('更新成功');
        history.push(`/generator/detail/${id}`);
      }
    } catch (error: any) {
      message.error('更新失败,' + error.message);
    }
  };

  /**
   * 提交
   * @param values
   */
  const doSubmit = async (values: API.GeneratorAddRequest) => {
    // 数据转换
    if (!values.fileConfig) {
      values.fileConfig = {};
    }
    if (!values.modelConfig) {
      values.modelConfig = {};
    }
    // 文件列表转 url
    if (values.distPath && values.distPath.length > 0) {
      // @ts-ignore
      values.distPath = values.distPath[0].response;
    }

    if (id) {
      await doUpdate({
        id,
        ...values,
      });
    } else {
      await doAdd(values);
    }
  };

  return (
    <ProCard>
      {/* 创建或者已加载要更新的数据时,才渲染表单,顺利填充默认值 */}
      {(!id || oldData) && (
        <StepsForm<API.GeneratorAddRequest | API.GeneratorEditRequest>
          formRef={formRef}
          formProps={{
            initialValues: oldData,
          }}
          onFinish={doSubmit}
        >
          <StepsForm.StepForm name="base" title="基本信息">
            <ProFormText name="name" label="名称" placeholder="请输入名称" />
            <ProFormTextArea name="description" label="描述" placeholder="请输入描述" />
            <ProFormText name="basePackage" label="基础包" placeholder="请输入基础包" />
            <ProFormText name="version" label="版本" placeholder="请输入版本" />
            <ProFormText name="author" label="作者" placeholder="请输入作者" />
            <ProFormSelect label="标签" mode="tags" name="tags" placeholder="请输入标签列表" />
            <ProFormItem label="图片" name="picture">
              <PictureUploader biz="generator_picture" />
            </ProFormItem>
          </StepsForm.StepForm>
          <StepsForm.StepForm name="fileConfig" title="文件配置">
            {/* todo 待补充 */}
          </StepsForm.StepForm>
          <StepsForm.StepForm name="modelConfig" title="模型配置">
            {/* todo 待补充 */}
          </StepsForm.StepForm>
          <StepsForm.StepForm name="dist" title="生成器文件">
            <ProFormItem label="产物包" name="distPath">
              <FileUploader biz="generator_dist" description="请上传生成器文件压缩包" />
            </ProFormItem>
          </StepsForm.StepForm>
        </StepsForm>
      )}
    </ProCard>
  );
};

export default GeneratorAddPage;
4. 详情页
展示代码生成器的详细信息,并且让用户下载生成器文件。依赖的后端接口
- 根据 id 获取生成器详情
- 根据 id 下载代码生成器文件
1. 下载生成器文件接口
- 做好权限控制(仅登录用户可下载),并打上下载日志
/**
 * 根据 id 下载
 *
 * @param id
 * @return
 */
@GetMapping("/download")
public void downloadGeneratorById(long id, HttpServletRequest request, HttpServletResponse response) throws IOException {
    if (id <= 0) {
        throw new BusinessException(ErrorCode.PARAMS_ERROR);
    }
    User loginUser = userService.getLoginUser(request);
    Generator generator = generatorService.getById(id);
    if (generator == null) {
        throw new BusinessException(ErrorCode.NOT_FOUND_ERROR);
    }

    String filepath = generator.getDistPath();
    if (StrUtil.isBlank(filepath)) {
        throw new BusinessException(ErrorCode.NOT_FOUND_ERROR, "产物包不存在");
    }

    // 追踪事件
    log.info("用户 {} 下载了 {}", loginUser, filepath);

    COSObjectInputStream cosObjectInput = null;
    try {
        COSObject cosObject = cosManager.getObject(filepath);
        cosObjectInput = cosObject.getObjectContent();
        // 处理下载到的流
        byte[] bytes = IOUtils.toByteArray(cosObjectInput);
        // 设置响应头
        response.setContentType("application/octet-stream;charset=UTF-8");
        response.setHeader("Content-Disposition", "attachment; filename=" + filepath);
        // 写入响应
        response.getOutputStream().write(bytes);
        response.getOutputStream().flush();
    } catch (Exception e) {
        log.error("file download error, filepath = " + filepath, e);
        throw new BusinessException(ErrorCode.SYSTEM_ERROR, "下载失败");
    } finally {
        if (cosObjectInput != null) {
            cosObjectInput.close();
        }
    }
}
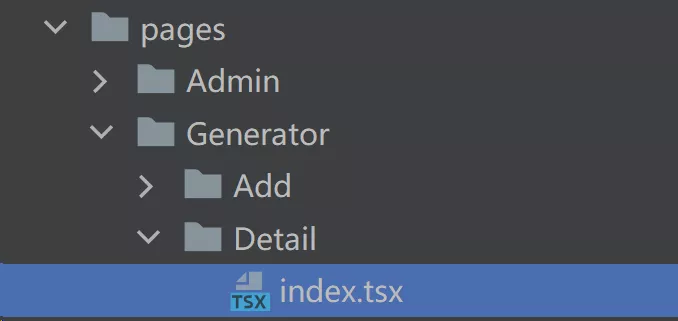
2. 详情页面开发
- 先定义路由,需要将路径指定为动态的,根据生成器的 id 加载不同内容
{
  path: '/generator/detail/:id',
  icon: 'home',
  component: './Generator/Detail',
  name: '生成器详情',
  hideInMenu: true,
},
- 在详情页中,可以通过
useParams钩子函数获取到动态路由的id,获取到生成器的信息
const { id } = useParams();
const [loading, setLoading] = useState<boolean>(false);
const [data, setData] = useState<API.GeneratorVO>({});

const loadData = async () => {
  if (!id) {
    return;
  }
  setLoading(true);
  try {
    const res = await getGeneratorVoByIdUsingGet({
      id,
    });
    setData(res.data || {});
  } catch (error: any) {
    message.error('获取数据失败,' + error.message);
  }
  setLoading(false);
};

useEffect(() => {
  loadData();
}, [id]);
- 自上而下开发页面,展示信息即可
- 可以先编写基本的结构,具体下载功能的实现、详细配置最后再写
- 页面上半部分展示生成器的基本信息、以及一些操作按钮
- 下半部分展示详细配置和作者信息。3 个 tab 栏,可以分别将每个 tab 栏的内容定义为组件,父页面就很干净
<Card>
  <Row justify="space-between" gutter={[32, 32]}>
    <Col flex="auto">
      <Space size="large" align="center">
        <Typography.Title level={4}>{data.name}</Typography.Title>
        {tagListView(data.tags)}
      </Space>
      <Typography.Paragraph>{data.description}</Typography.Paragraph>
      <Typography.Paragraph type="secondary">
        创建时间:{moment(data.createTime).format('YYYY-MM-DD hh:mm:ss')}
      </Typography.Paragraph>
      <Typography.Paragraph type="secondary">基础包:{data.basePackage}</Typography.Paragraph>
      <Typography.Paragraph type="secondary">版本:{data.version}</Typography.Paragraph>
      <Typography.Paragraph type="secondary">作者:{data.author}</Typography.Paragraph>
      <div style={{ marginBottom: 24 }} />
      <Space size="middle">
        <Button type="primary">立即使用</Button>
        <Button icon={<DownloadOutlined />}>下载</Button>
      </Space>
    </Col>
    <Col flex="320px">
      <Image src={data.picture} />
    </Col>
  </Row>
</Card>
<Tabs
  size="large"
  defaultActiveKey={'fileConfig'}
  onChange={() => {}}
  items={[
    {
      key: 'fileConfig',
      label: '文件配置',
      children: <FileConfig data={data} />,
    },
    {
      key: 'modelConfig',
      label: '模型配置',
      children: <ModelConfig data={data} />,
    },
    {
      key: 'userInfo',
      label: '作者信息',
      children: <AuthorInfo data={data} />,
    },
  ]}
/>

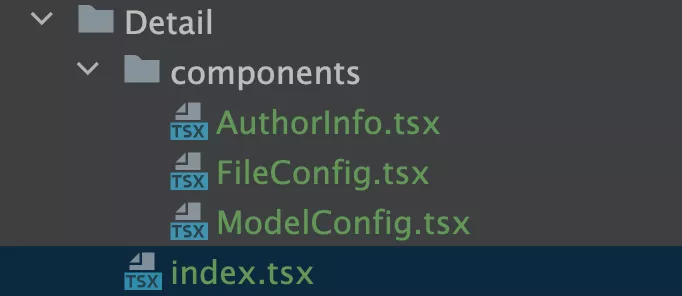
- 开发详细信息组件
1. FileConfig组件
import { FileOutlined, InfoCircleOutlined } from '@ant-design/icons';
import { Descriptions, DescriptionsProps, Divider } from 'antd';
import React from 'react';

interface Props {
  data: API.GeneratorVO;
}

/**
 * 文件配置
 * @constructor
 */
const FileConfig: React.FC<Props> = (props) => {
  const { data } = props;

  const fileConfig = data?.fileConfig;
  if (!fileConfig) {
    return <></>;
  }

  const items: DescriptionsProps['items'] = [
    {
      key: 'inputRootPath',
      label: '输入根路径',
      children: <p>{fileConfig.inputRootPath}</p>,
    },
    {
      key: 'outputRootPath',
      label: '输出根路径',
      children: <p>{fileConfig.outputRootPath}</p>,
    },
    {
      key: 'sourceRootPath',
      label: '项目根路径',
      children: <p>{fileConfig.sourceRootPath}</p>,
    },
    {
      key: 'type',
      label: '文件类别',
      children: <p>{fileConfig.type}</p>,
    },
  ];

  const fileListView = (files?: API.FileInfo[]) => {
    if (!files) {
      return <></>;
    }

    return (
      <>
        {files.map((file, index) => {
          // 是分组
          if (file.groupKey) {
            const groupFileItems: DescriptionsProps['items'] = [
              {
                key: 'groupKey',
                label: '分组key',
                children: <p>{file.groupKey}</p>,
              },
              {
                key: 'groupName',
                label: '分组名',
                children: <p>{file.groupName}</p>,
              },
              {
                key: 'condition',
                label: '条件',
                children: <p>{file.condition}</p>,
              },
              {
                key: 'files',
                label: '组内文件',
                children: <p>{fileListView(file.files)}</p>,
              },
            ];

            return (
              <Descriptions key={index} column={1} title={file.groupName} items={groupFileItems} />
            );
          }

          const fileItems: DescriptionsProps['items'] = [
            {
              key: 'inputPath',
              label: '输入路径',
              children: <p>{file.inputPath}</p>,
            },
            {
              key: 'outputPath',
              label: '输出路径',
              children: <p>{file.outputPath}</p>,
            },
            {
              key: 'type',
              label: '文件类别',
              children: <p>{file.type}</p>,
            },
            {
              key: 'generateType',
              label: '文件生成类别',
              children: <p>{file.generateType}</p>,
            },
            {
              key: 'condition',
              label: '条件',
              children: <p>{file.condition}</p>,
            },
          ];

          return (
            <>
              <Descriptions column={2} key={index} items={fileItems} />
              <Divider />
            </>
          );
        })}
      </>
    );
  };

  return (
    <div>
      <Descriptions
        title={
          <>
            <InfoCircleOutlined /> 基本信息
          </>
        }
        column={2}
        items={items}
      />
      <div style={{ marginBottom: 16 }} />
      <Descriptions
        title={
          <>
            <FileOutlined /> 文件列表
          </>
        }
      />
      {fileListView(fileConfig.files)}
    </div>
  );
};

export default FileConfig;
2. ModelConfig组件
import { FileOutlined } from '@ant-design/icons';
import { Descriptions, DescriptionsProps, Divider } from 'antd';
import React from 'react';

interface Props {
  data: API.GeneratorVO;
}

/**
 * 模型配置
 * @constructor
 */
const ModelConfig: React.FC<Props> = (props) => {
  const { data } = props;

  const modelConfig = data?.modelConfig;
  if (!modelConfig) {
    return <></>;
  }

  const modelListView = (models?: API.ModelInfo[]) => {
    if (!models) {
      return <></>;
    }

    return (
      <>
        {models.map((model, index) => {
          // 是分组
          if (model.groupKey) {
            const groupModelItems: DescriptionsProps['items'] = [
              {
                key: 'groupKey',
                label: '分组key',
                children: <p>{model.groupKey}</p>,
              },
              {
                key: 'groupName',
                label: '分组名',
                children: <p>{model.groupName}</p>,
              },
              {
                key: 'condition',
                label: '条件',
                children: <p>{model.condition}</p>,
              },
              {
                key: 'models',
                label: '组内模型',
                children: <p>{modelListView(model.models)}</p>,
              },
            ];

            return (
              <Descriptions
                key={index}
                column={1}
                title={model.groupName}
                items={groupModelItems}
              />
            );
          }

          const modelItems: DescriptionsProps['items'] = [
            {
              key: 'fieldName',
              label: '字段名称',
              children: <p>{model.fieldName}</p>,
            },
            {
              key: 'type',
              label: '类型',
              children: <p>{model.type}</p>,
            },
            {
              key: 'description',
              label: '描述',
              children: <p>{model.description}</p>,
            },
            {
              key: 'defaultValue',
              label: '默认值',
              children: <p>{model.defaultValue as any}</p>,
            },
            {
              key: 'abbr',
              label: '缩写',
              children: <p>{model.abbr}</p>,
            },
            {
              key: 'condition',
              label: '条件',
              children: <p>{model.condition}</p>,
            },
          ];

          return (
            <>
              <Descriptions column={2} key={index} items={modelItems} />
              <Divider />
            </>
          );
        })}
      </>
    );
  };

  return (
    <div>
      <Descriptions
        title={
          <>
            <FileOutlined /> 模型列表
          </>
        }
      />
      {modelListView(modelConfig.models)}
    </div>
  );
};

export default ModelConfig;
3. AuthorInfo
作者信息组件
import { Avatar, Card } from 'antd';
import React from 'react';

interface Props {
  data: API.GeneratorVO;
}

/**
 * 作者信息
 * @constructor
 */
const AuthorInfo: React.FC<Props> = (props) => {
  const { data } = props;

  const user = data?.user;

  if (!user) {
    return <></>;
  }

  return (
    <div style={{ marginTop: 16 }}>
      <Card.Meta
        avatar={<Avatar size={64} src={user.userAvatar} />}
        title={user.userName}
        description={user.userProfile}
      />
    </div>
  );
};

export default AuthorInfo;
3. 下载功能实现
注意:按钮显隐的控制。eg:只有存在 distPath 代码包,才能下载;只有本人才能修改
/**
 * 下载按钮
 */
const downloadButton = data.distPath && currentUser && (
  <Button
    icon={<DownloadOutlined />}
    onClick={async () => {
      const blob = await downloadGeneratorByIdUsingGet(
        {
          id: data.id,
        },
        {
          responseType: 'blob',
        },
      );
      // 使用 file-saver 来保存文件
      const fullPath = data.distPath || '';
      saveAs(blob, fullPath.substring(fullPath.lastIndexOf('/') + 1));
    }}
  >
    下载
  </Button>
);

/**
 * 编辑按钮
 */
const editButton = my && (
  <Link to={`/generator/update?id=${data.id}`}>
    <Button icon={<EditOutlined />}>编辑</Button>
  </Link>
);
详情页中引用这两个按钮组件
import AuthorInfo from '@/pages/Generator/Detail/components/AuthorInfo';
import FileConfig from '@/pages/Generator/Detail/components/FileConfig';
import ModelConfig from '@/pages/Generator/Detail/components/ModelConfig';
import {
  downloadGeneratorByIdUsingGet,
  getGeneratorVoByIdUsingGet,
} from '@/services/backend/generatorController';
import { Link, useModel, useParams } from '@@/exports';
import { DownloadOutlined, EditOutlined } from '@ant-design/icons';
import { PageContainer } from '@ant-design/pro-components';
import { Button, Card, Col, Image, message, Row, Space, Tabs, Tag, Typography } from 'antd';
import { saveAs } from 'file-saver';
import moment from 'moment';
import React, { useEffect, useState } from 'react';

/**
 * 生成器详情页
 * @constructor
 */
const GeneratorDetailPage: React.FC = () => {
  const { id } = useParams();

  const [loading, setLoading] = useState<boolean>(false);
  const [data, setData] = useState<API.GeneratorVO>({});
  const { initialState } = useModel('@@initialState');
  const { currentUser } = initialState ?? {};
  const my = currentUser?.id === data?.userId;

  /**
   * 加载数据
   */
  const loadData = async () => {
    if (!id) {
      return;
    }
    setLoading(true);
    try {
      const res = await getGeneratorVoByIdUsingGet({
        id,
      });
      setData(res.data || {});
    } catch (error: any) {
      message.error('获取数据失败,' + error.message);
    }
    setLoading(false);
  };

  useEffect(() => {
    loadData();
  }, [id]);

  /**
   * 标签列表视图
   * @param tags
   */
  const tagListView = (tags?: string[]) => {
    if (!tags) {
      return <></>;
    }

    return (
      <div style={{ marginBottom: 8 }}>
        {tags.map((tag: string) => {
          return <Tag key={tag}>{tag}</Tag>;
        })}
      </div>
    );
  };

  /**
   * 下载按钮
   */
  const downloadButton = data.distPath && currentUser && (
    <Button
      icon={<DownloadOutlined />}
      onClick={async () => {
        const blob = await downloadGeneratorByIdUsingGet(
          {
            id: data.id,
          },
          {
            responseType: 'blob',
          },
        );
        // 使用 file-saver 来保存文件
        const fullPath = data.distPath || '';
        saveAs(blob, fullPath.substring(fullPath.lastIndexOf('/') + 1));
      }}
    >
      下载
    </Button>
  );

  /**
   * 编辑按钮
   */
  const editButton = my && (
    <Link to={`/generator/update?id=${data.id}`}>
      <Button icon={<EditOutlined />}>编辑</Button>
    </Link>
  );

  return (
    <PageContainer title={<></>} loading={loading}>
      <Card>
        <Row justify="space-between" gutter={[32, 32]}>
          <Col flex="auto">
            <Space size="large" align="center">
              <Typography.Title level={4}>{data.name}</Typography.Title>
              {tagListView(data.tags)}
            </Space>
            <Typography.Paragraph>{data.description}</Typography.Paragraph>
            <Typography.Paragraph type="secondary">
              创建时间:{moment(data.createTime).format('YYYY-MM-DD hh:mm:ss')}
            </Typography.Paragraph>
            <Typography.Paragraph type="secondary">基础包:{data.basePackage}</Typography.Paragraph>
            <Typography.Paragraph type="secondary">版本:{data.version}</Typography.Paragraph>
            <Typography.Paragraph type="secondary">作者:{data.author}</Typography.Paragraph>
            <div style={{ marginBottom: 24 }} />
            <Space size="middle">
              <Button type="primary">立即使用</Button>
              {downloadButton}
              {editButton}
            </Space>
          </Col>
          <Col flex="320px">
            <Image src={data.picture} />
          </Col>
        </Row>
      </Card>
      <div style={{ marginBottom: 24 }} />
      <Card>
        <Tabs
          size="large"
          defaultActiveKey={'fileConfig'}
          onChange={() => {}}
          items={[
            {
              key: 'fileConfig',
              label: '文件配置',
              children: <FileConfig data={data} />,
            },
            {
              key: 'modelConfig',
              label: '模型配置',
              children: <ModelConfig data={data} />,
            },
            {
              key: 'userInfo',
              label: '作者信息',
              children: <AuthorInfo data={data} />,
            },
          ]}
        />
      </Card>
    </PageContainer>
  );
};

export default GeneratorDetailPage

主页的生成器卡片增加跳转到详情页的链接
<Link to={`/generator/detail/${data.id}`}>
  <Card hoverable cover={<Image alt={data.name} src={data.picture} />}>
    ...
  </Card>
</Link>